Introduction
There is a browser based user interface to explore things, policies and connections. The UI can be used to access the REST API of any Ditto instance. Several Ditto instances can be configured as “Environments”
How to use
The latest version of the Explorer UI is available online here
There is also a Docker image prepared to server the latest version by docker:
# to start the latest released UI version:
docker run -p 8088:8080 eclipse/ditto-ui

# or to start the latest nightly instead:
docker run -p 8088:8080 eclipse/ditto-ui:nightly
Environments
You can use the Explorer UI with different Ditto instances and switch easily between them.
For example you can work with your local running Ditto instance and the remote Eclipse Ditto sandbox instance. Another example would be to use different stages of Ditto like development, test and production.
Create a new environment
To create a new environment you just need to specify
- a unique name
- the api URI to reach Ditto
- whether it is a Ditto 2 or Ditto 3 version (only relevant if you want to use the connectivity API of Ditto prior to version 3)

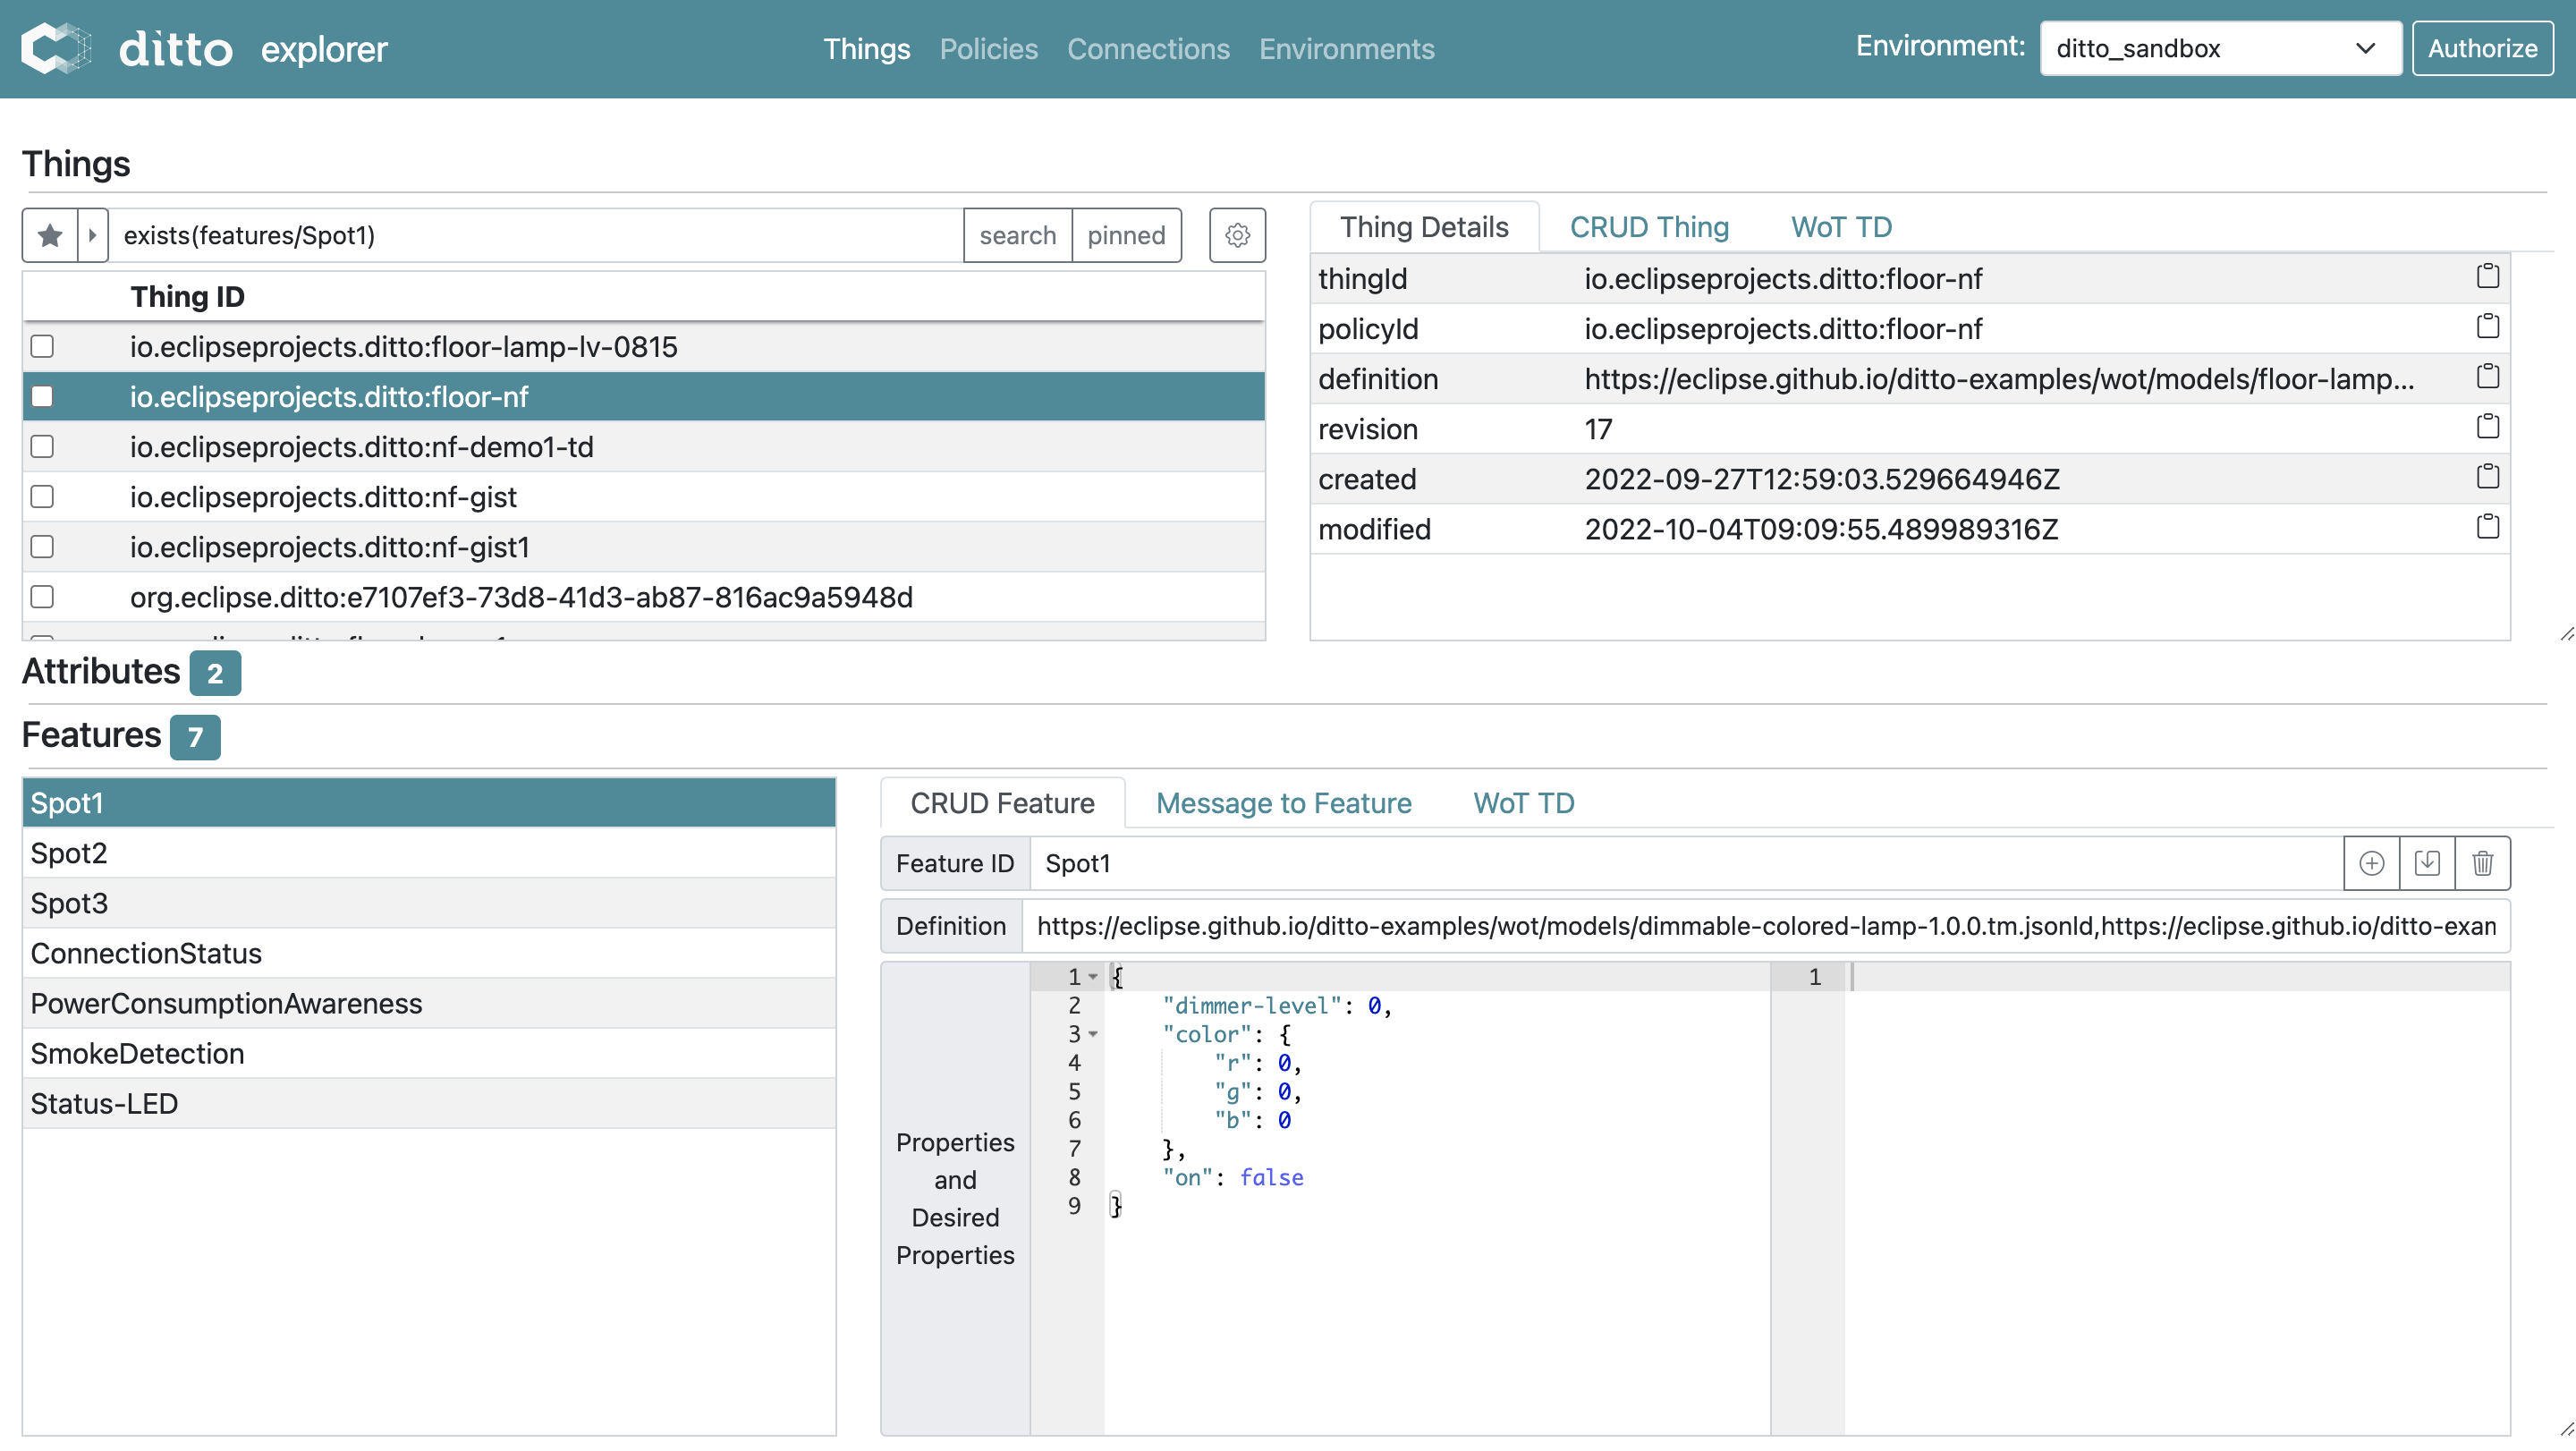
Selecting an environment
Select an environment in the drop down in the upper right:

Control environments by URL parameters
The following query parameters can be used to control environments
| URL query parameter | Description |
|---|---|
primaryEnvironmentName |
Name of an environment to be selected by default |
environmentsURL |
URL to a json file with environment configurations |
Authorization
To access the REST API of your selected Ditto instance you must provide valid credentials by clicking on “Authorize”