Downloads
This page provides downloads for both (1) the N4JS builds and (2) the N4JS development environment (including sources) of N4JS.
N4JS Compiler
System Requirements: Java, Node.js (versions see below).
N4JS provides the following builds at the download locations listed below:
-
Compiler / LSP server as jar
Compiler / LSP server as an npm package (available via npmjs.com)
VSCode extension for N4JS (available via VSCode marketplace and the download locations below)
Download locations
-
Eclipse Foundation (currently outdated)
enfore AG
N4JS Sources
System Requirements: Java, Node.js, Yarn (versions see below).
To develop on the N4JS Project (e.g. improve/fix the compiler, lsp server, etc.) we recommend to install the development environment with the Eclipse Installer. The Eclipse Installer will install the Eclipse IDE, download the N4JS Java sources and configure the workspace. Download and start the installer to follow these steps (click on the images to enlarge):
-
 Switch to Advanced Mode via the menu located in the upper-right corner.
This will let you select the product with version and a specific project (N4JS).
-
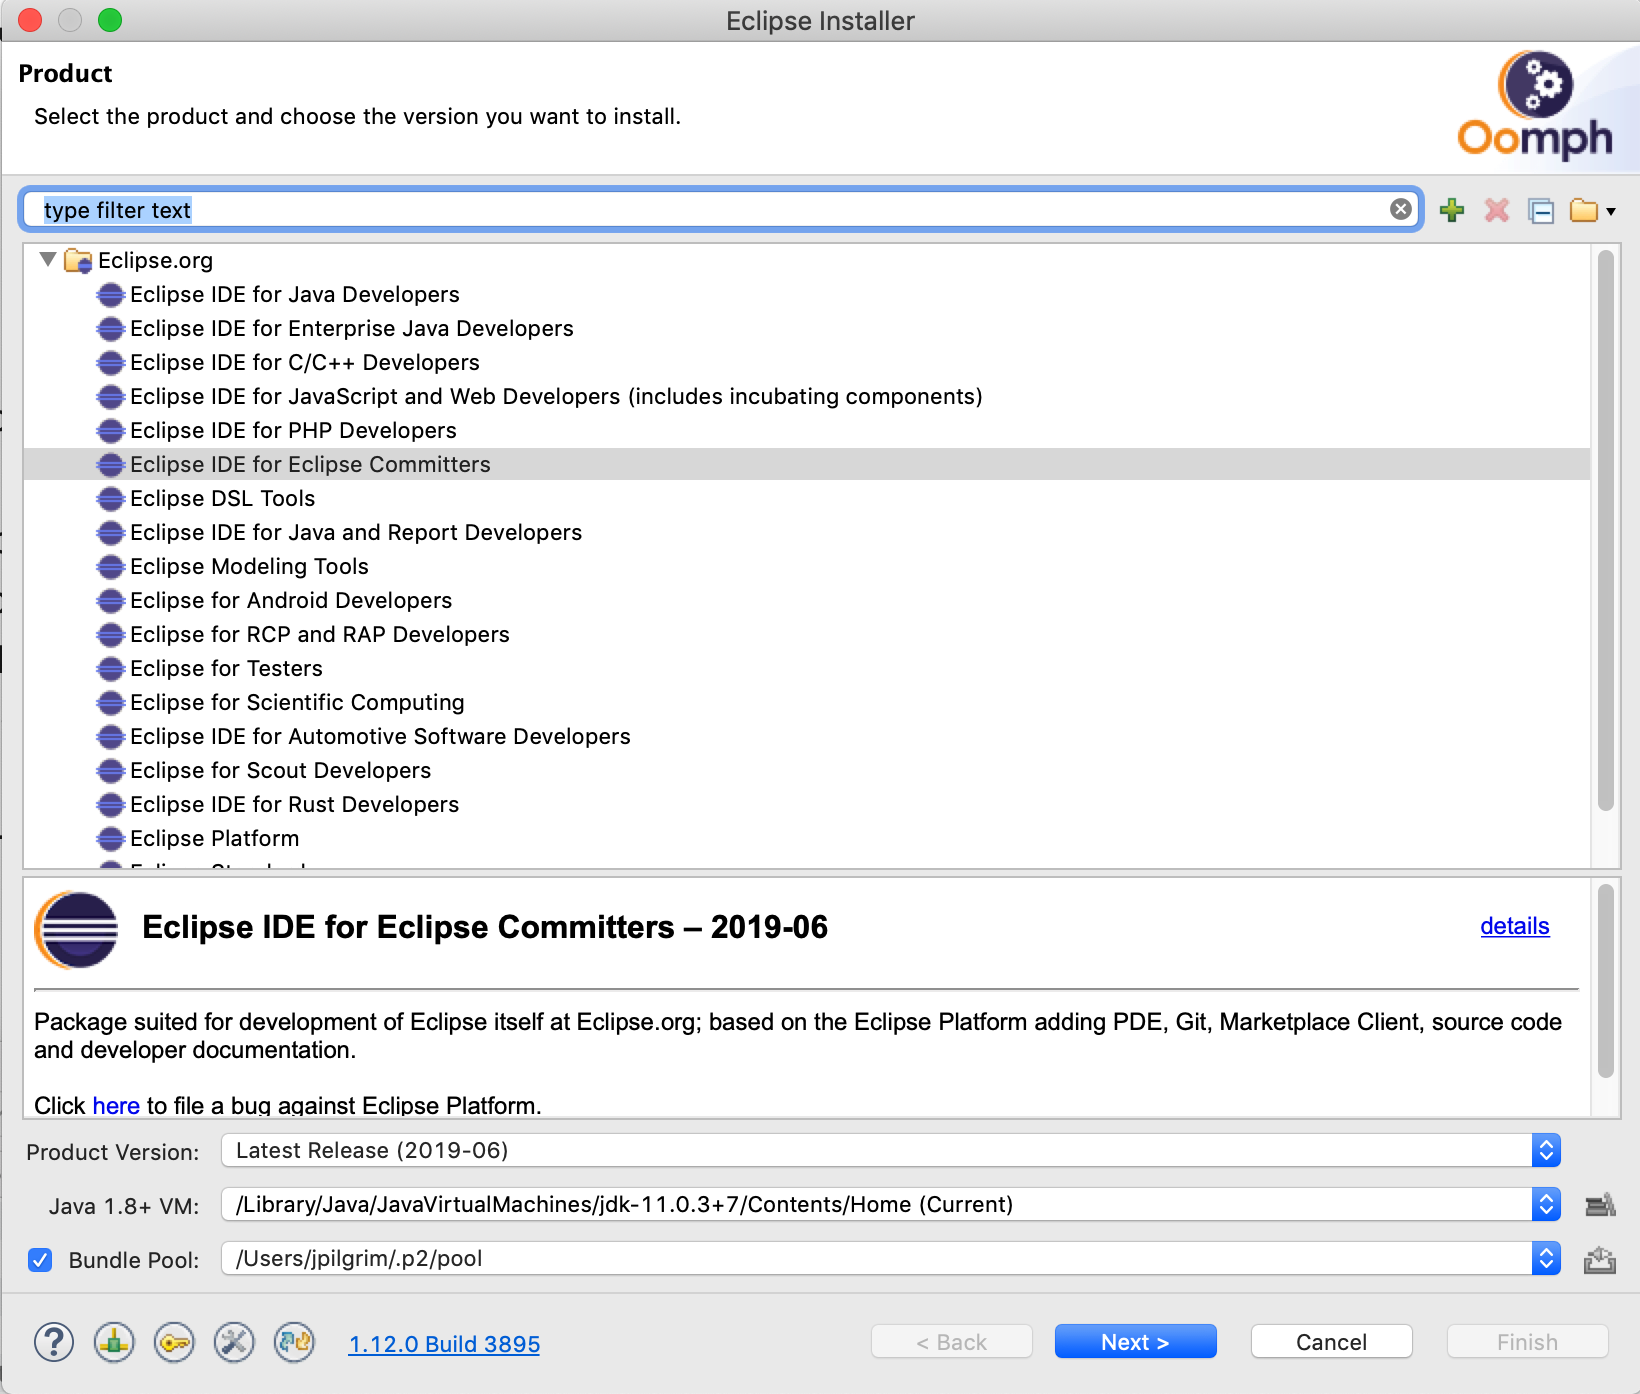
 Select a product and the product version.
We recommend "Eclipse IDE for Eclipse Committers" (product version see below).
Click "Next".
-
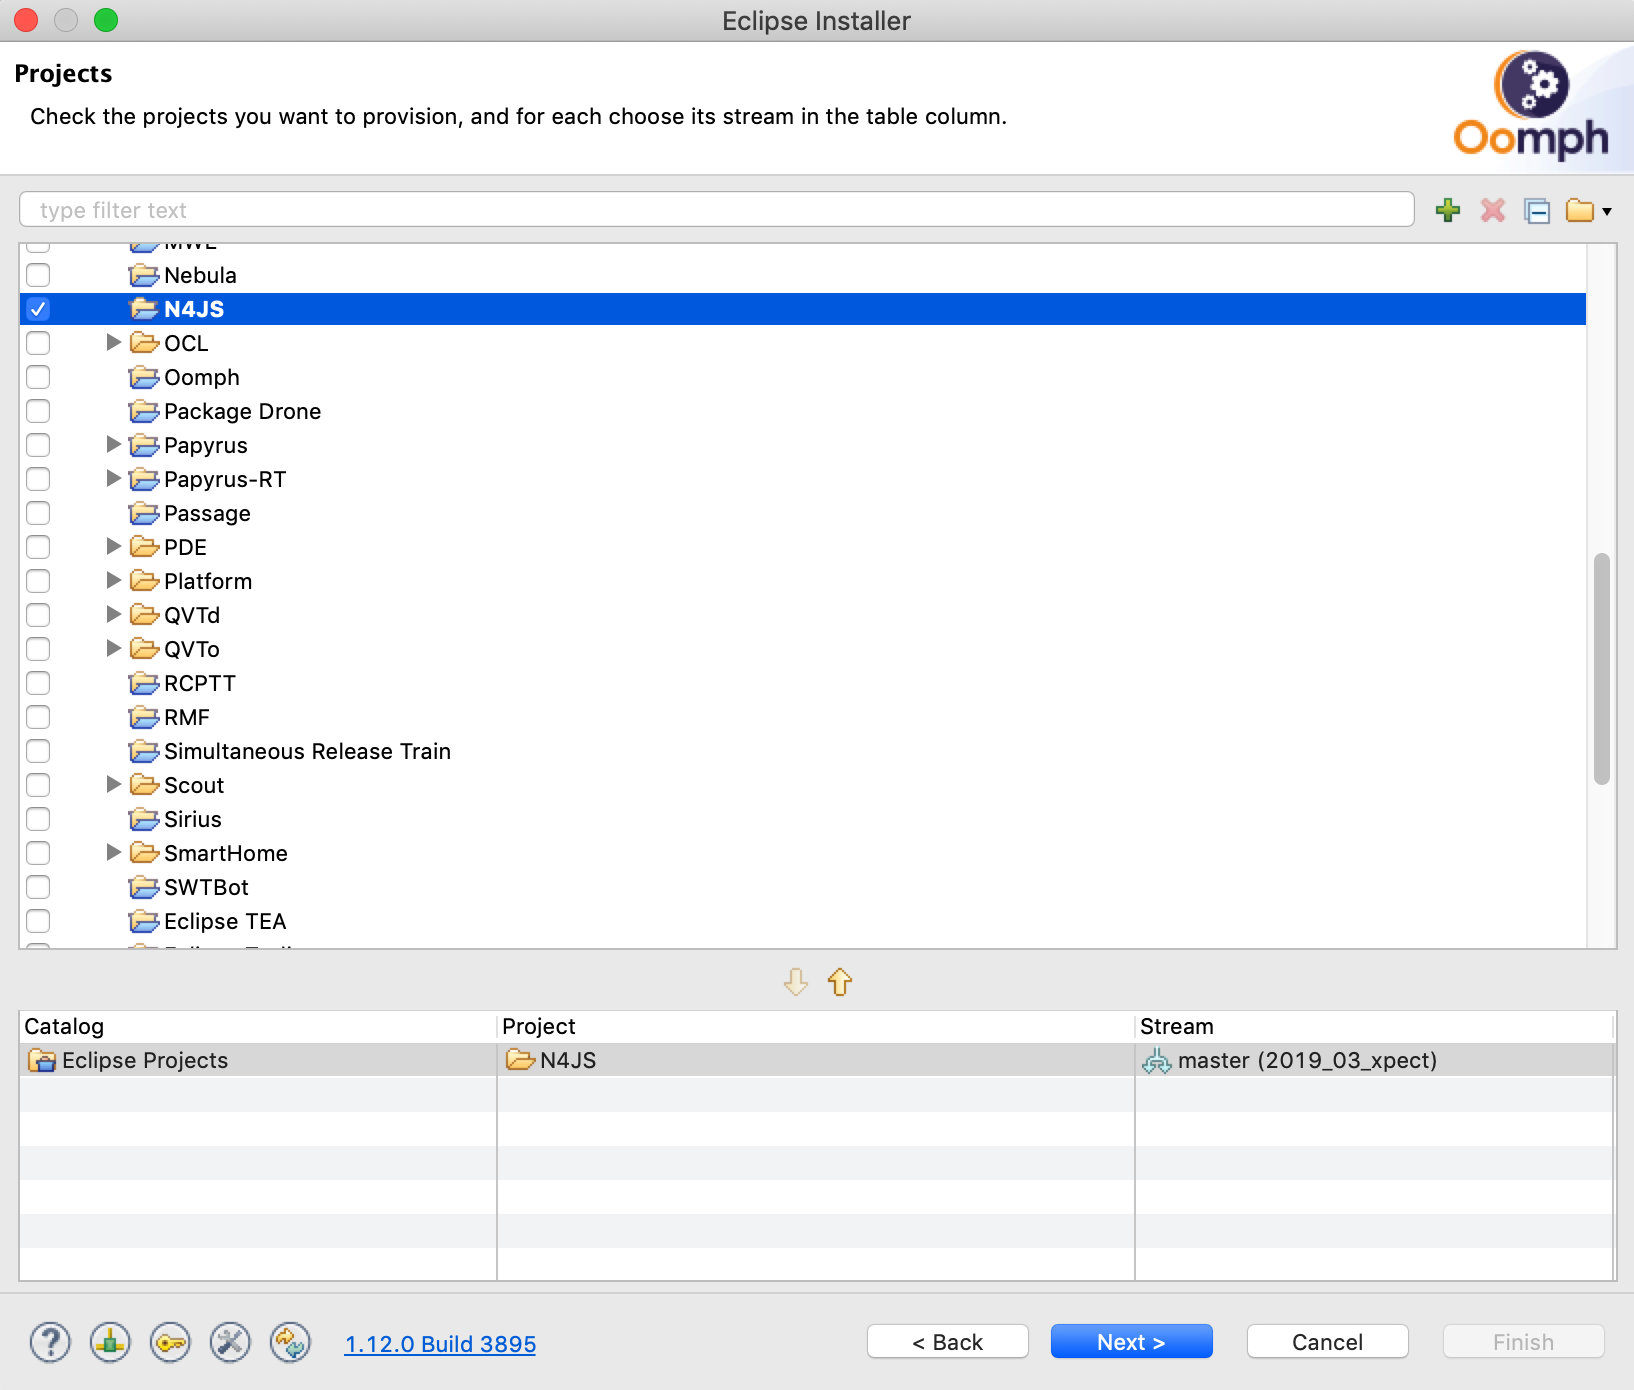
 Check the entry N4JS in the category "Eclipse Projects" so that it is shown in the catalog view below.
Click "Next".
- Configure your desired paths for the installation and workspace directories. Check "Show all variables" if not checked already. Regarding "N4JS Github repository" you have the choices GIT, HTTPS read/write, and HTTPS read-only. In case you chose GIT, mind the trouble shooting hints below. Click "Next" and then "Finish".
-
Automatic installation by the Eclipse installer and the setup tasks
- The Eclipse Installer will download and install the Eclipse IDE and all its plugins.
- The installed Eclipse IDE is started by the installer.
-
 The installation continues inside the IDE by running all setup tasks.
You can see the running setup tasks by clicking on the animated yellow/blue arrow icon in the status bar at the bottom of the IDE window.
In this step, the workspace is configured automatically.
This includes fetching the necessary git repository.
If you have selected GIT and run into an error, mind the hints below.
-
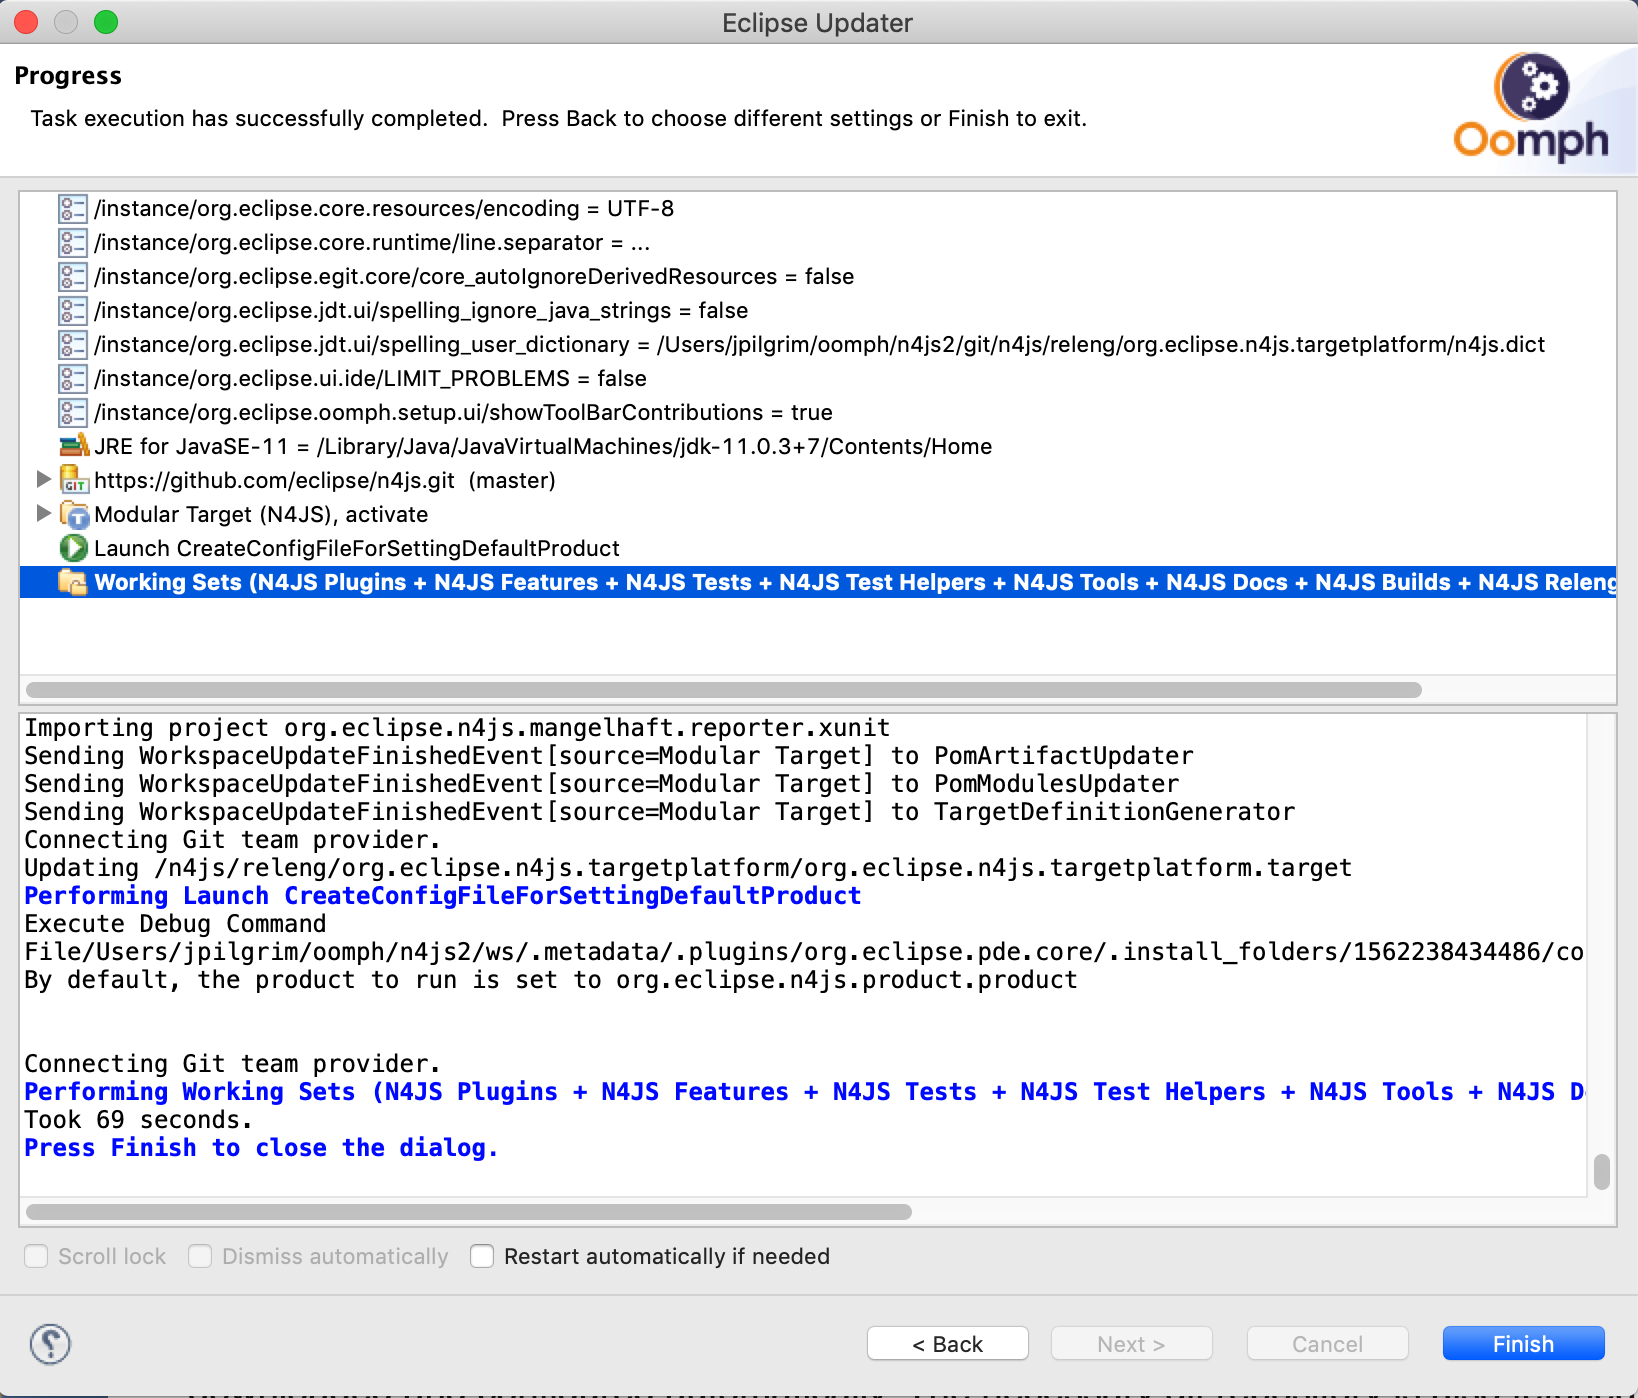
 Eventually the setup tasks are done, that means the git repository has been cloned and the workspace has been configured (including the project set setup).
-
Now the automatical build kicks in as you can see in the status bar.
The build will show a lot of errors while still working.
Eventually the whole project should have been compiled without any errors.

- Unfortunately, at the moment there will be a few compile errors after everything is finished completely. Please consult the Github issue 1373 to fix it.
Trouble Shooting
-
Compile errors after installation or clean-build
Unfortunately, due to Github issue 1373, two problems exists which cause some compile errors to show up. Please have a look at the linked issue on how to fix that (it is quite easy).
-
SSH error when downloading a file 'content.xml'
This error happens when your Java version is outdated. The reason is that Java comes with its own set of SSH certificates which might get incomplete or partly revoked over time.
-
Error "No more authentication methods available"
This error is related to your choice of the git protocol ("N4JS Github repository"):
-
GIT: Make sure that you have your public/private key pair in your .ssh directory, otherwise the installer will say "No more authentication methods available".
In that case, there are two fixes:
- Either quit the installer, go to the Eclipse preferences, search for SSH2, and point to your keys. Afterwards, restart the installer by Help->Perform Setup Tasks.
- Alternativily, chose the button "Back" in the setup tasks wizard and go back to the beginning, click on "Show all Variables" and then change the git repository to HTTPS. Afterwards, click finish to execute the setup tasks again.
- HTTPS read/write: you need to specify your github user ID below.
- HTTPS read-only: works always but you cannot push changes.
-
GIT: Make sure that you have your public/private key pair in your .ssh directory, otherwise the installer will say "No more authentication methods available".
In that case, there are two fixes:
Required Versions
- Java 11
- Node.js 12.13.x
- Yarn 1.19.x
- Eclipse Product Version: Eclipse 2019-09 release
