Run Server from source
In order to run the server products from the sources, you need to first install the basic steps for running Hawk from source.
You will have to additionally import the projects inside the server folder, and resolve the Ivy dependencies for:
org.eclipse.hawk.service.artemisorg.eclipse.hawk.service.server.users.servlet
Once you have done that, to run the server product, you should open the .product file inside the org.eclipse.hawk.service.server.product project. The editor will look like this one:
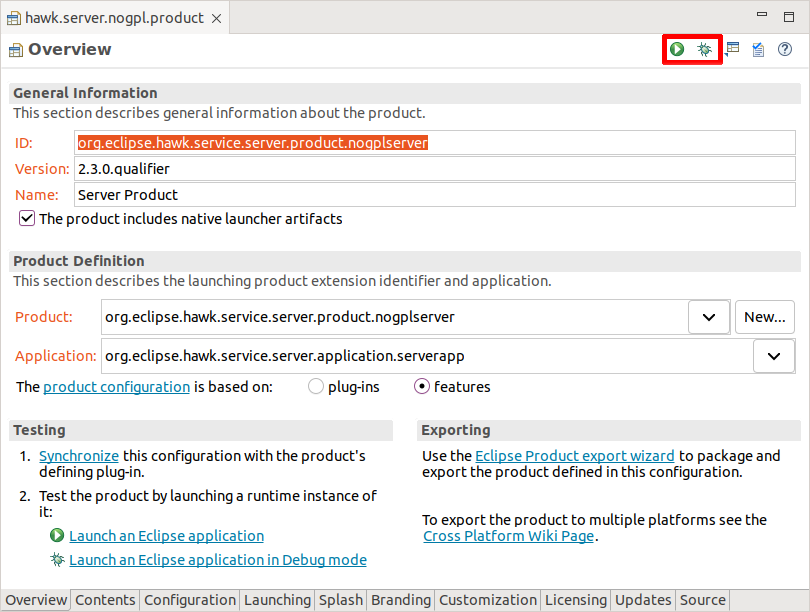
You should use one of the buttons highlighted in red (the triangle "Run" button or the bug-like "Debug" button on the top right) to run the product for the first time.
Eventually, you should see this text:
Welcome to the Hawk Server!
List available commands with 'hserverHelp'.
Stop the server with 'shutdown' and then 'close'.
You are done! You can also use "Debug" to track bugs in the server itself.
Note: if you would like to make changes to the Thrift API, you will need to edit the src/api.emf Emfatic file in the org.eclipse.hawk.service.api project, and then regenerate the api.thrift file by using Ecore2Thrift. After that, you will need to run the Thrift code generator through the generate.sh script in the root of the same project.
Troubleshooting
The launch configuration may fail in older versions of Eclipse, due to the slightly buggy way in which they produced the launch configuration from the product. If you see this:
!MESSAGE Application error
!STACK 1
java.lang.RuntimeException: No application id has been found.
That means you need to tweak the launch configuration a bit. Shutdown the server by entering shutdown and then close in the "Console" view, and then open the "Run" menu and select "Run Configurations...".
Select the relevant "Eclipse Application" launch configuration and go to the "Plug-ins" section. If you are using an older version of Eclipse which does not support running from a selection of features, you may see an interface like this:

Click on "Add Required Plugins" (it may be called "Select required" in newer versions): you'll notice that it adds quite a few things. Click on "Run" now: it should work fine.