N4JS IDE Setup
Get the most from type safe development with the custom-built N4JS IDE
In order to fully utilize the strengths of the language, N4JS has its own Eclipse-based IDE with custom features designed to support safe and intuitive development of large-scale server-side applications. Code is validated as you type and workflow tools such as content assist and quick-fixes ensure applications are written safely and consistently. The N4JS IDE is a powerful tool for developing collaborative projects that are to be maintained over a long period of time.
Installation
For all available options for downloads and installation steps using the Eclipse Installer, see the download page.
Requirements
Java 11
In order to run the N4JS IDE, Java 11 is required. Note that there exists a version of the IDE which includes an embedded JRE-11. Java installer packages can be downloaded from Oracle’s Java pages. For Mac OS X users: Always install the JDK - the JRE is installed and only used in web browsers, not applications.
Existing Eclipse installation
When installing the N4JS features into an existing Eclipse installation, Xtext 2.9.1 must be available. In general, N4JS is based on the Eclipse Mars release.
node.js
In order to run or test code from the IDE, node.js 6 (or later) is required.
Launching the IDE
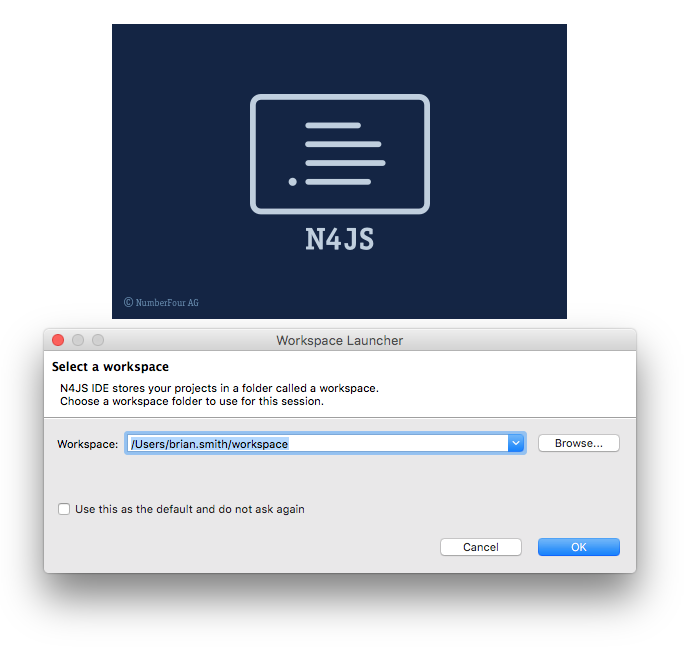
When launching the N4JS IDE, a dialog box allows to specify a workspace which is used to organize related projects in a single folder. A new name and location for the workspace can be selected but for this example we shall use the default settings.
| To manage the workspaces that are displayed in the workspace launcher, navigate to |
N4JS IDE Overview
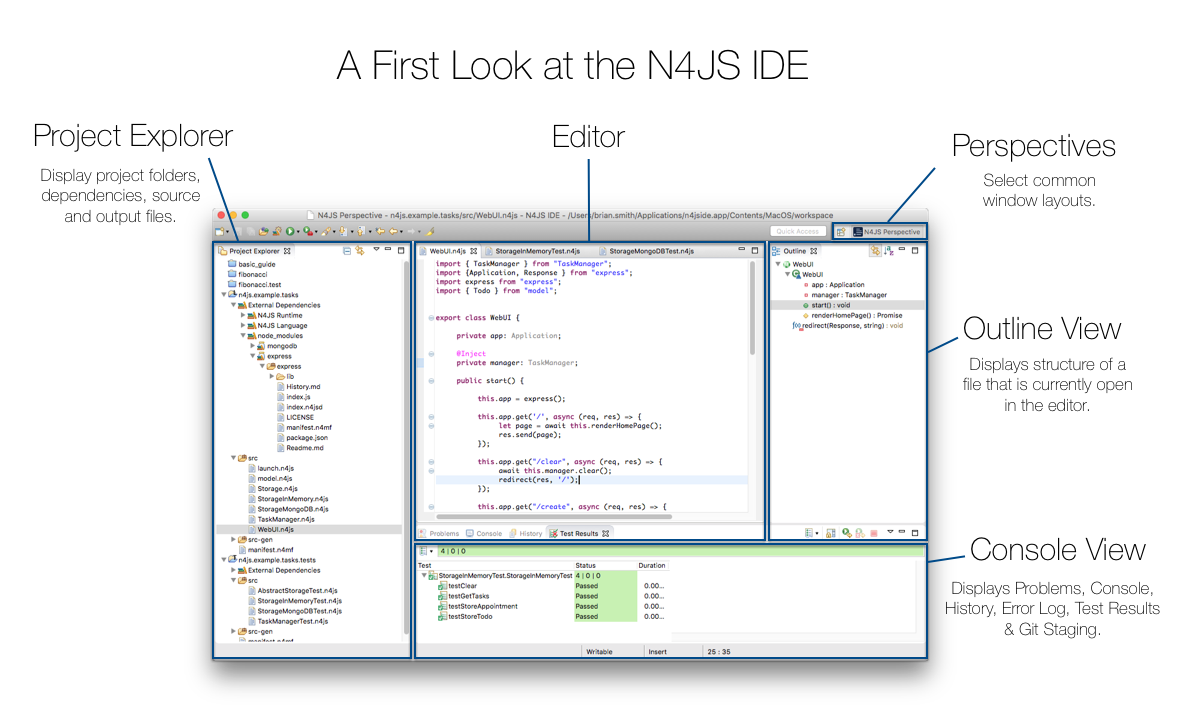
Developers who have previous experience using Eclipse will be familiar with many common UI features such as the Editor, Project Outline, Project Explorer and Console views. The arrangement of views can be easily selected using the perspectives icons as highlighted in the upper-right of the window as shown above.
Creating a new project
After having set up a default workspace, a new project can be created using the New N4JS Project wizard which is accessed at (Or using the keyboard shortcuts ⌘+Option+N for Mac, Alt-Shift-N on Windows)
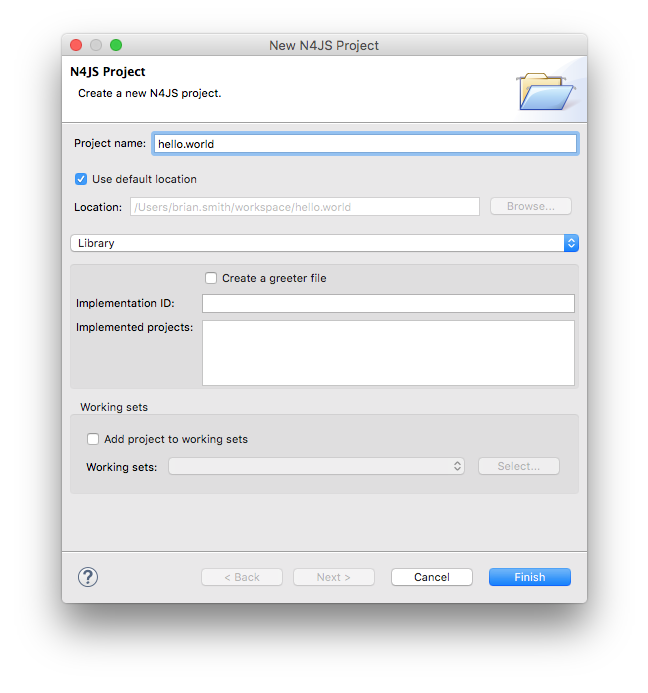
In this case, we name the project "hello.world" and select Finish to create a project in the default location (our current workspace). The New N4JS Project wizard will also ask to specify a working set to include the project in. Working sets are for grouping together elements to be displayed and will allow the user to focus on specific projects and files without switching between workspaces. At this point, it is not necessary to add working sets, but when dealing with multiple projects, working sets can be a highly efficient way of switching between related projects and resources.
Project Explorer
The Project Explorer view will display the structure of our new project:
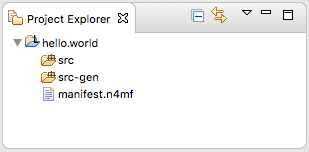
In the Project Explorer view, our project "hello.world" contains three folders with our resources:
-
src will contain our .n4js source files.
-
src-gen will contain the transpiled JavaScript that is generated after compiling n4js files. The IDE automatically transpiles n4js files on save.
-
manifest.n4mf is the project description file which contains descriptions of dependencies.
Creating a new class
In our new N4JS project, we can use the New N4JS Class wizard (accessed at or ⌘+Option+n) to create a new class called "HelloWorld":
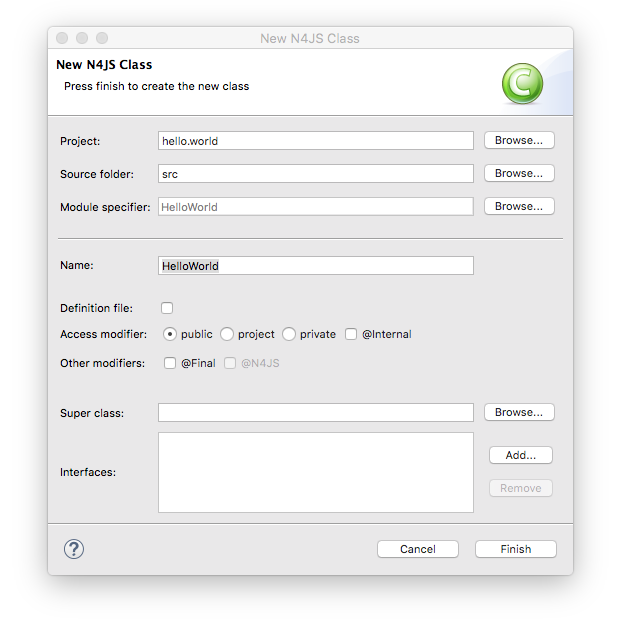
Let’s have a look at what a simple HelloWorld! example looks like in N4JS:
export public class HelloWorld {
  public say_hi() {
	  var message: string = "Hello World!";
	  console.log(message);
  }
}
var announce = new HelloWorld();
announce.say_hi();
We can see some similarities with Java and JavaScript in this example, but with some notable features:
-
export makes the HelloWorld class available for import in another file or project. We modify this using the public keyword to specify where it is available. This demonstrates the use of modules inside N4JS which are fully explained in the Modules feature
-
string we use the type annotation string to define that the message variable is of type string. More can be read about type annotations in the Nominal vs. Structural Typing feature.
As we have used the export keyword and made the class public using the public access modifier, it is possible to call the methods of this class in another project. If we wanted to restrict access to this element, we would use protected so it may only be accessed from subclasses and private for within the same module only. The default visibility of an element is project.
If we create a new class and define it as follows:
import { HelloWorld } from "HelloWorld";

export public class Caller  {
  public call ()  {
    var c = new HelloWorld;
    return c;
  }
}
We can run this module named "HelloCaller" and invoke the methods from our HelloWorld class.
Outline View
The Outline View is a useful tool that provides a quick overview of the structure of our applications. If we look at the Outline View while we are editing our HelloWorld examples, we can see the following:
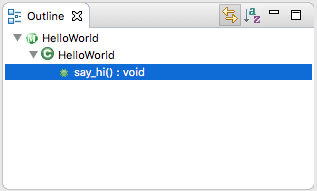
The Outline View displays the structure of our very basic class with only one method. As projects become more populated and increase in complexity, the Outline View becomes helpful by assisting with navigating through the structure of a file.
| Instead of having the Outline View always open in the IDE, the shortcut ⌘+O will open a Quick Outline window on demand. With this Quick Outline window open, begin typing to easily search for fields, methods and classes. |
Running as node.js
To run this file, right-click inside the editor view and select Run as | Launch in Node.js:
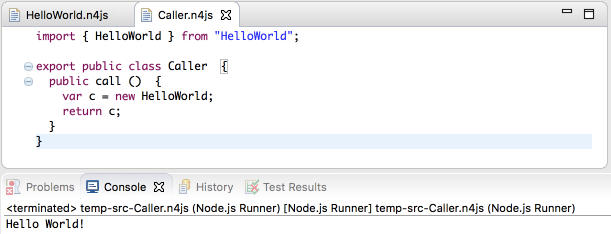
The Console View will display the result of our console.log command, and our Hello World! example is running in the N4JS IDE without errors.
What’s Next?
After creating a project and running some sample code, the next step we can have a look at is exporting our project as an npm package followed by running it from the command line and publishing to the npm registry. This is covered in the export to npm guide.