test plan: wtp project explorer.

| wst common test plan: wtp project explorer. | |
| WTP Project Explorer Core Function | |||||
The WTP Project Explorer is developed as a generic framework for third party vendors to extend. Basic facilities for improving usability and coordination among contributions are discussed below. | |||||
Show Projects / Working Sets | |||||
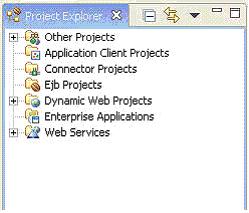
By default, when the WTP Project Explorer surfaces, the available module groupings will be shown. | |||||
| |||||
These groupings associate similar projects under a logical ("abstract") header. Users can choose to show only the simple projects by | |||||
| |||||
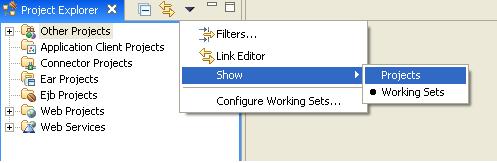
Select "Projects" from the WTP Project Explorer View Menu. Ensure that the projects appear in the root of the viewer. Select "Working Sets" from the WTP Project Explorer View Menu. Ensure that the projects are grouped. | |||||
| |||||
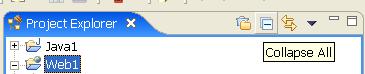
Collapse All | |||||
The "Collapse All" button pushes the WTP Project Explorer into a fully collapsed state. Expand a few items in the viewer and then toggle the "Collapse All" button. | |||||
| |||||
Link with Editor | |||||
The "Link with Editor" button keeps the current selection in the WTP Project Explorer in sync with the open editors (when possible). Unlike the Java Package Explorer or the Resource Navigator, it may not always be possible to isolate an exact selection. However, resource selections and Java selections should always be functional. | |||||
| |||||
Before proceeding, ensure that you have created a few Java classes and simple text file. If you skipped the previous section on creating Java and resource content, please return to it now before proceeding. The following steps require at least the creation of a Java project with a Java class and a text file. Together, these two artifacts should be sufficient to make sure that the "Link with Editor" support is working as designed for Java and resource content. | |||||
Now that you have a few resources to use for this test, toggle the "Link with Editor" button so that it is in a depressed state. Double click TestClass.java under Java1/src/test.pakg/TestClass.java to open this file in the Java editor. Then double click TestFile.txt to open this file in a text editor. Now as you change your selection in the WTP Project Explorer, the correct editor should automatically activate and come to the forefront. When you select the editor, it should activate the correct selection in the WTP Project Explorer. | |||||
Filters and Types of Content | |||||
In order to customize the look and feel of the WTP Project Explorer and to allow the ability to show or hide content based on a user's input, filters are used. The filters can prevent an uninterested user from seeing types of extraneous content or files. | |||||
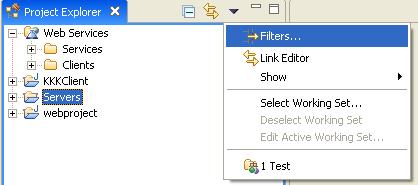
The filters dialog is accesed by hitting the triangle on the top right of the Project Explorer and selecting Filters... | |||||
| |||||
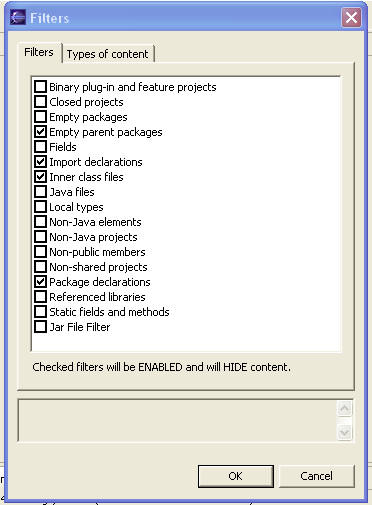
The first tab of this dialog is the Filters tab: | |||||
| |||||
It is important to note that filters which are checked here are enabled to hide content. | |||||
| |||||
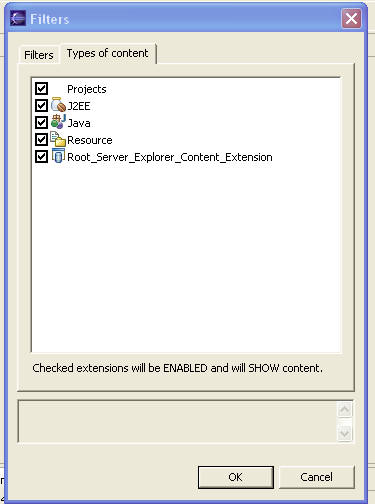
The second tab of this dialog is the "Types of content" page: | |||||
| |||||
It is import to note that unlike the first page, extensions checked here will enable to show content, not hide it. | |||||
| |||||
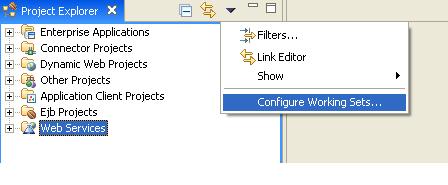
Selecting Working Sets to view | |||||
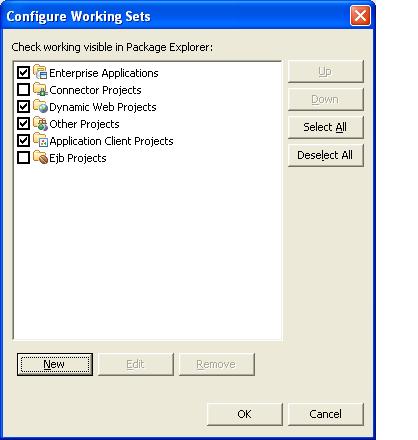
In the "Working set" mode select "Configure Working Sets...". | |||||
| |||||
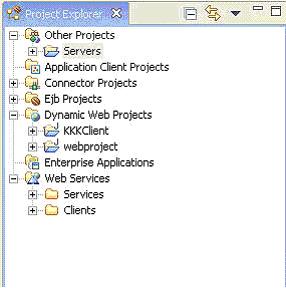
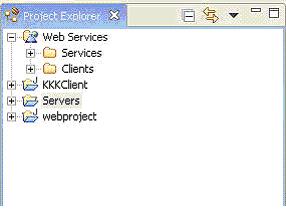
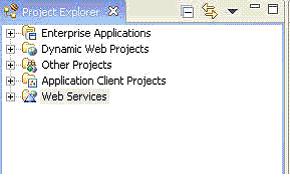
Uncheck "Ejb Projects" and "Connector Projects". Ensure that the Project Explorer does not show Ejb Projects and Connector Projects in the navigator and the the Ejb Projects and Connector Projects are moved in the "Other Projects" if they do not contain any other components. | |||||
| |||||
Return to overview. | |||||