| |
-
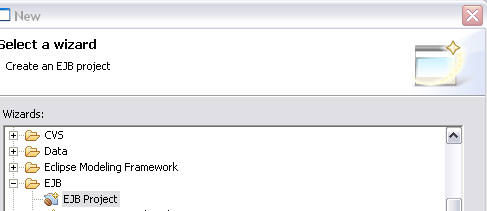
Open the J2EE perspective, from the File menu,
New->Project->EJB->EJB Project
-
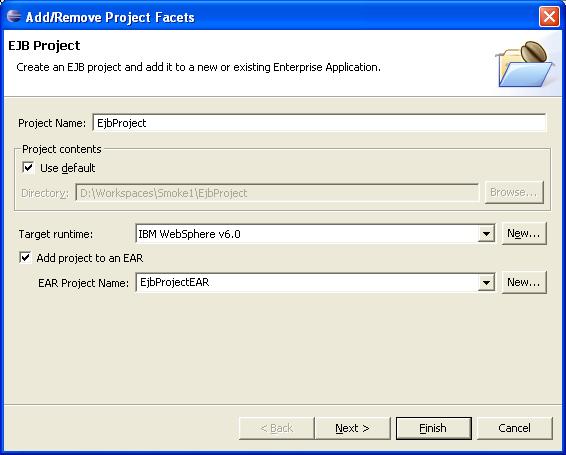
You will see EJB Project wizard
Create the EJB project name "EJBProject", you will see
that by default "Add Module to an EAR application"
is checked and the name is defaulted to
"EJBProjectEAR", this will create an EAR module in a
project with the name "EJBModuleEAR". You will need
to select a valid server target from the list
provided. If no server targets are installed follow
the "new" button to install.
-
Click Next to go to Select Project Facets Page. You can install
additional factets and bind to a runtime.

-
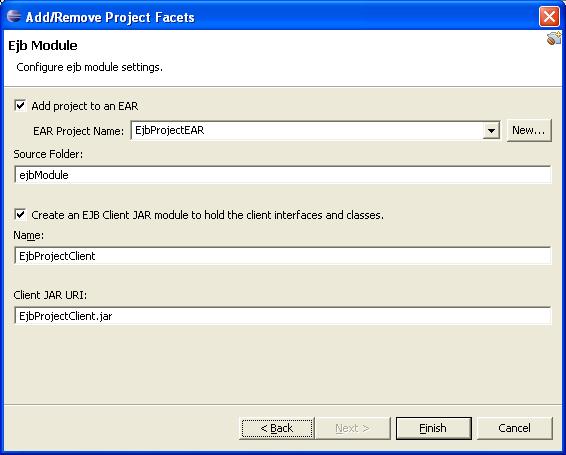
Click Next to go to Settings Page. You can overwrite the
default settings here.
-
Hit finish, the ejb project will be created.
-
Verify that in the .wtpmodule file of the
EJBModule
- The workbench project/component "EJBProject" exists
-
The "EJBProjectClient" module is dependent
module of the "EJBProject"
-
Verify that in the .wtpmodule file of the
EJBProjectEAR
-
The workbench project/component "EJBProjectEAR" exists
-
The "EJBProject" and the "EJBProjectClient"
are the dependent modules of the
"EJBProjectEAR"
-
Verify that in the .wtpmodule file of the
EJBModuleClient
-
The workbench module "EJBProjectClient"
exists
-
Verify that in the EJBProject deployment descriptor
there is an entry EJBProjectClient.jar in the
<ejb-client-jar>
-
Verify that in the EJBProjectEAR deployment
descriptor there is an entry EJBProject.jar in the
<module> section
-
Build the modules, you will notice .deployables
folder created in the projects.
Verify that you see following
|