| Eclipse Corner Article |

Summary
In this tutorial we will create and execute a web application with JavaServer Faces capabilities.By Gerry Kessler, Oracle Corporation.
December 19, 2005
In this tutorial we will create and execute a web application with
JavaServer Faces capabilities.
You may wish to visit Building
and Running a Web Application before attempting this tutorial. That
tutorial covers setup of the server instance that this tutorial does
not.
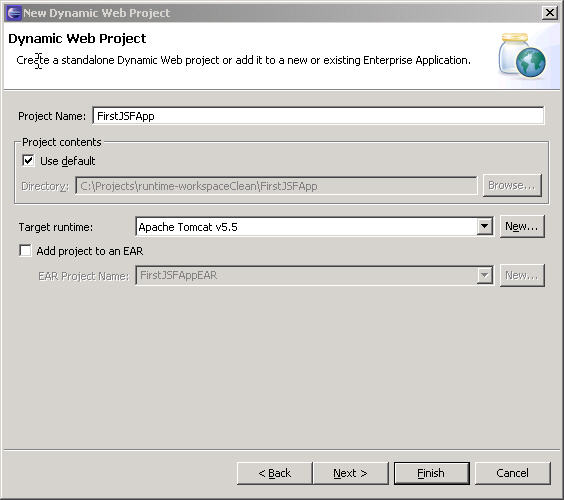
1) Create a New Dynamic Web Application with the name of FirstJSFApp.
Set the target runtime to the Apache Tomcat 5.5
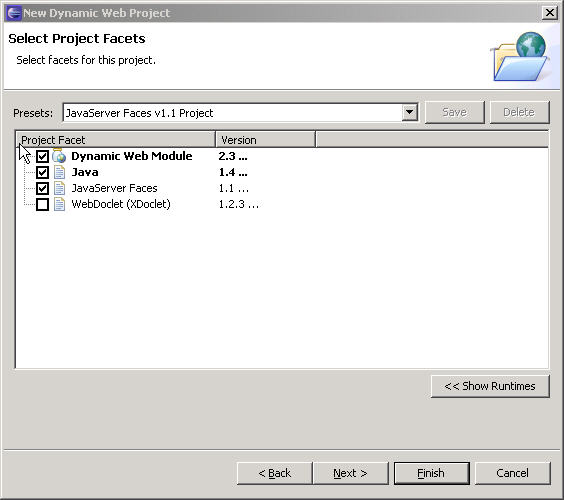
2) On the next wizard page, add the JavaServer Faces facet. Use the
preset combo box to choose a version 1.1 project.
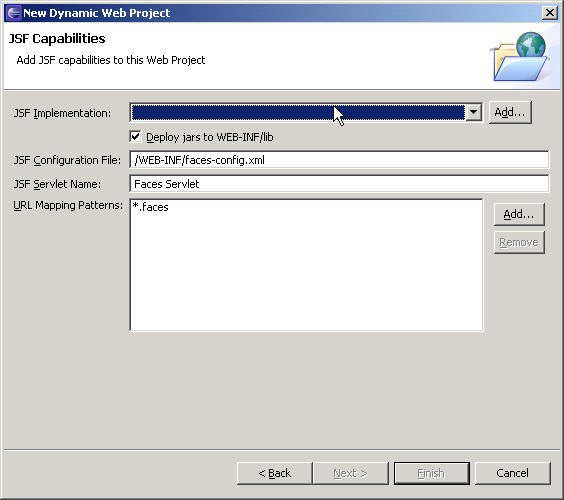
3) On the JSF Capabilities page we will need to specify and create a
JSF Implementation library. This feature allows for a named sets of jars
to be created for use with JSF Applications. We will be creating a
library containing the Sun JSF RI and Apache JSTL jars so that our
application can execute against Apache Tomcat. Click on the Add… button.
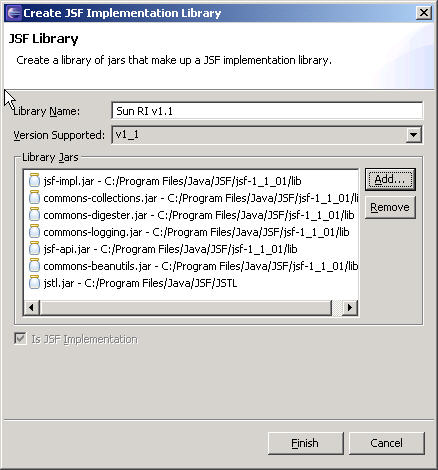
4) Create the JSF Implementation library with the name and the jars
shown below. Click on the Finish button.
5) This library will now be selected as the implementation to use
with this application.
Click on the Finish button to create the JavaServer Faces
Application. You may be prompted to accept the license for the Web App
DTD from Sun. You may also be asked to choose the J2EE perspective upon
completion. In both cases accept.

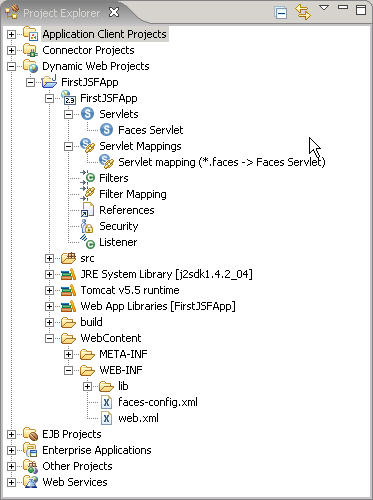
6) Your JSF application has been created. Note that the web.xml file
has been updated with the Faces Servlet and servlet-mapping, a stub JSF
application configuration file (faces-config.xml) has been created, and
the implementation jars have been copied to the Web App Libraries
classpath container.
![]() If you have an
existing Dynamic Web Application, it is possible to add JSF capabilities
by going to:
If you have an
existing Dynamic Web Application, it is possible to add JSF capabilities
by going to:
Project Properties > Project Facets > Add\Remove Project
Facets…
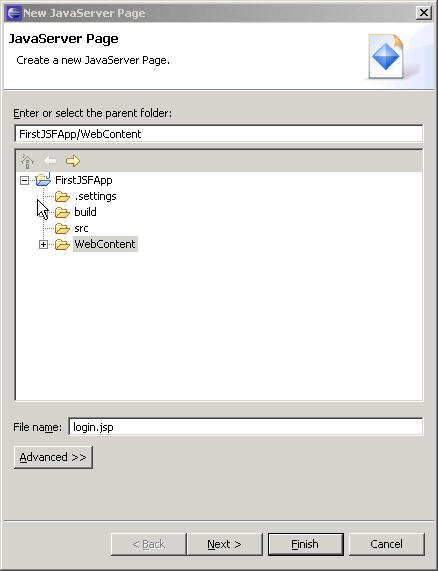
1) Use the JSP Page wizard to create a page called login.jsp in the
Web Content folder of the new application. Click Finish.
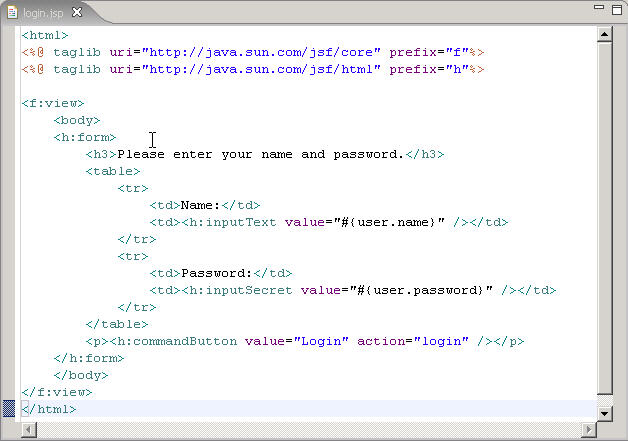
2) Delete the generated contents of the JSP page and replace with the
code below which makes use of some standard JSF components:
<html>
<%@ taglib uri="http://java.sun.com/jsf/core" prefix="f"%>
<%@ taglib uri="http://java.sun.com/jsf/html" prefix="h"%>

<f:view>
	<body>
	<h:form>
		<h3>Please enter your name and password.</h3>
		<table>
			<tr>
				<td>Name:</td>
				<td><h:inputText value="#{user.name}" /></td>
			</tr>
			<tr>
				<td>Password:</td>
				<td><h:inputSecret value="#{user.password}" /></td>
			</tr>
		</table>
		<p><h:commandButton value="Login" action="login" /></p>
	</h:form>
	</body>
</f:view>
</html>
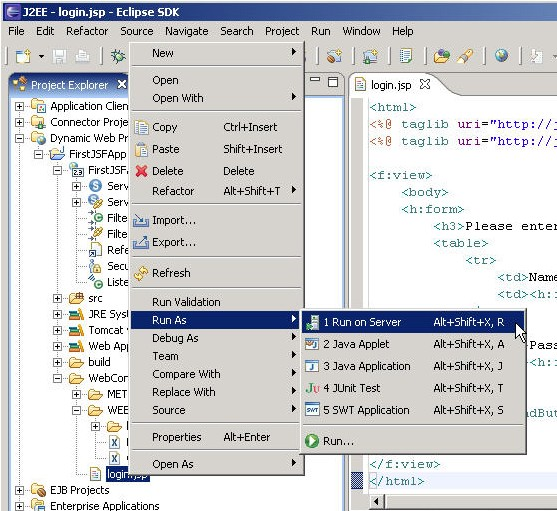
1) We will now execute the page against the Apache Tomcat server.
Choose Run on Server using the context menu while selecting the
login.jsp page in the navigator.
2) Choose your Apache Tomcat server and set it up as required if you
had not already done so.
3) Click Finish. You should see from the Console view that the Tomcat
server starts and then you should see the executing login page appear in
the Web Browser like below.
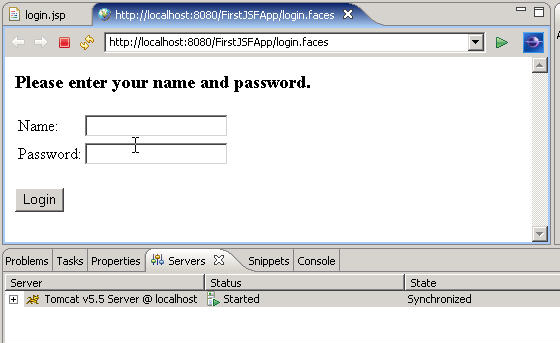
Congratulations! You have created and executed your first JavaServer Faces application using the new Eclipse WTP JSF tooling.