Twitter Logo Follow us on Twitter
Project Information About this project

Deploying a RAP Application to a Servlet Container

The following tutorial shows how to create a WAR file that contains the org.eclipse.rap.demo project as a RAP application.

Note: As with RCP applications there are a wide variety of possible configurations. What's given in this tutorial is just one possibility.

As prerequisites we assume that you:

  • are familiar with the bundles- and build information section of the Equinox in a Servlet Container document.
  • have installed the WAR Products tooling from this p2 repository http://download.eclipse.org/releases/indigo into your IDE. This tooling is part of Libra and not part of RAP. Anyway it can be used to deploy RAP applications in a very comfortable way.
  • have set a target platform that contains RAP.

Import org.eclipse.rap.demo into your workspace

  • Open the Plug-ins view.
  • Select the org.eclipse.rap.demo plug-in and use the command Import As > Source Project from the context menu to import org.eclipse.rap.demo as a project in your workspace.
Import RAP demo project

Create a .warproduct configuration

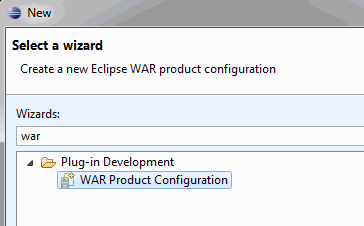
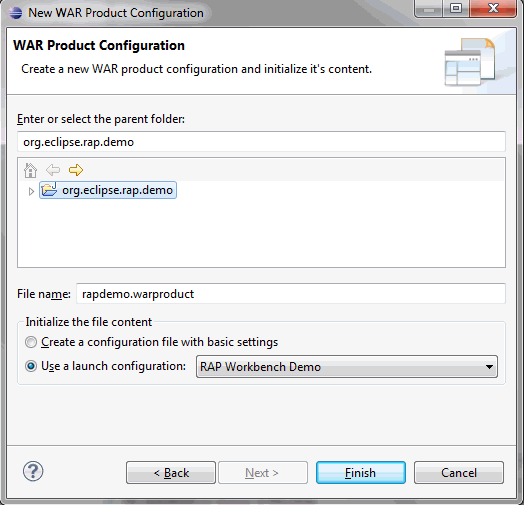
Building a WAR file using the WAR Products tooling is centered around a .warproduct configuration. The .warproduct configuration is entirely managed by the WAR Products tooling to simplify war deployment. It's format is internal and is not intended to be read by tools other than the WAR Products tooling. To create a .warproduct configuration you can use a working launch configuration. Follow these steps to create a rapdemo.warproduct configuration for the RAP demo application:

  • Open the New WAR Product Configuration wizard.
    WAR product wizard
  • Enter a name for the war configuration file and select the RAP Workbench Demo from the available launch configurations.
    WAR product configuration

The rapdemo.warproduct configuration

WAR Products tooling provides a form-based multi-page editor to manage a .warproduct configuration. The editor has the following pages:

  • Overview: on this page you can enter additional information like ID, Name, Version but they are not needed to export a war archive. Also the WAR Product export wizard can be started from the Overview page.
    WAR Product editor
  • Configuration: Here you can manage which plug-ins and libraries to be included into the war archive.
    WAR Product editor configuration
  • web.xml: On this page the web.xml of the war archive can be edited.
    WAR Product editor web.xml

Create the WAR archive

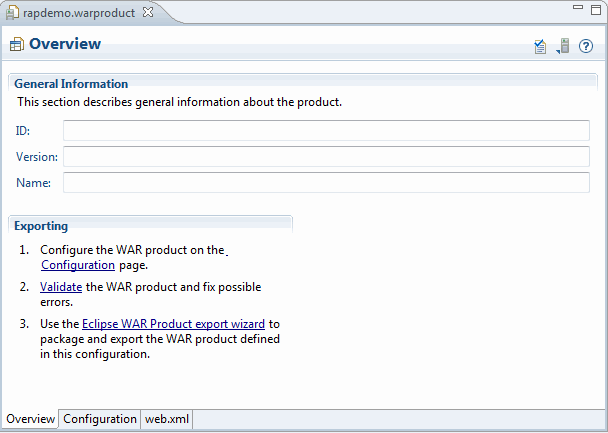
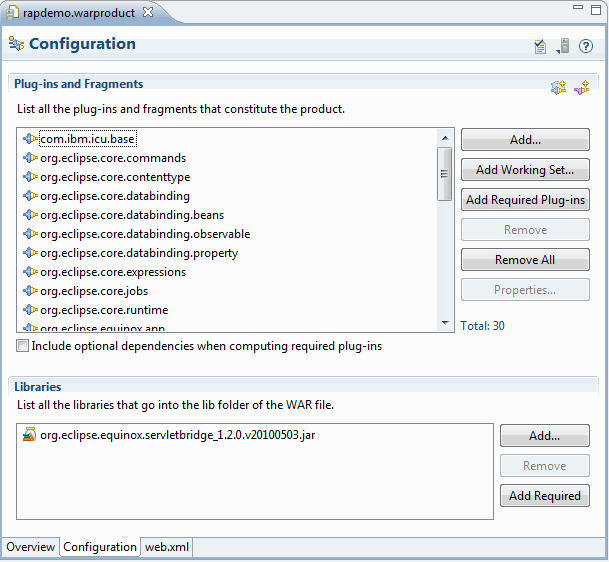
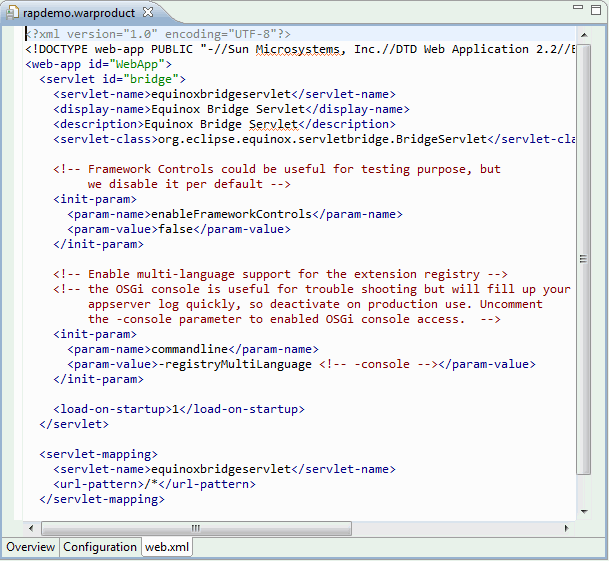
From the Overview page of the .warproduct configuration editor start the WAR Product export wizard (this can also be reached by launching the general Export Wizard), enter the location for the war archive and press Finish if no validation errors exist. After that you can deploy the WAR file to a servlet container. See the uncommented sections in the web.xml for more information on how to activate the OSGi-console. This is useful if you run into troubles while deploying the generated WAR file.

How to deploy my own application?

To deploy your own application like described above you will have to create your own .warproduct configuration. The configuration should contain the same plug-in references as the rapdemo.configuration (except the demo-plug-in of course!) plus the plug-ins that make up your application. It is important that your plug-ins reference the Servlet API by using the Import-Package directive instead of the Require-Bundle directive. See the MANIFEST.MF of the demo project for an example.

Note: Besides the application server log files there also exists an Equinox framework log that can be found under the webapp's work directory, e.g. on Tomcat:

<tomcat-installation>/work/Catalina/localhost/demo/eclipse/workspace/.metadata/.log 

In case Equinox isn't able to start at all, you may also look for log files at:

<tomcat-installation>/work/Catalina/localhost/demo/eclipse/configuration 

Troubleshooting

You can use the following checklist to find errors when your exported application does not work:

  • Check your build.properties file
    • Are you exporting the plugin.xml?
    • If you are using plugin.properties files, make sure they are exported.
    • Are all libraries you are using listed on the plug-ins class path?
    • Tip: As PDE build sometimes swallows error messages try exporting your feature with Deployable Feature export, this may turn up error messages.
  • Enable the OSGi console by adding this init-param to the web.xml:
    <init-param>
      <param-name>commandline</param-name>
      <param-value>-console</param-value>
    </init-param>
    • You can add a port after -console and then telnet to the OSGi console:
      telnet localhost <port>.
    • Type ss in the console and see if all bundles are started. If not try starting them with start <bundle-id>. The stack traces may hint to what is missing.
    • Make sure that there is a org.eclipse.equinox.servletbridge.extensionbundle in the ss-listing who's state is RESOVLED.
  • Make sure that the WAR does not contain the javax.servlet bundle. In the plug-in manifest the javax.servlet must be listed in the Import-Package section, not in Require-Bundle.
  • Make sure that the WAR does not contain the org.eclipse.update.configurator bundle.
  • Does the WAR contain compile errors? If so, you will probably find a zip archive somewhere in your output folder. It contains log files with the compiler output.
  • Start with a working example: Download rapdemo.war and integrate your plug-ins.
  • Use the product export to validate your feature:
    • Create a product configuration with an arbitrary name (File > New > Other > Product Configuration).
    • Select The product configuration is based on features on the Overview page.
    • Add your feature to the list of features on the Dependencies page.
    • Press the Validate button in the top-left corner of the editor. Ignore complaints about missing javax.servlet packages. Be aware that unresolved optional dependencies aren't reported as errors.
  • If you are re-deploying, make sure to delete the work directory of your servlet engine (e.g. <tomcat_install>/work/Catalina/localhost/<webapp_name> in Tomcat).

Further hints can be found in the RAP FAQ