Copyright
© 2001 Object Technology International, Inc.
|
Eclipse Corner Article |

Creating Your Own Widgets using SWT
Summary
When writing applications, you typically use the standard widgets provided by
SWT. On occasion, you will need to create your own custom widgets. For example,
you might want to add a new type of widget not provided by the standard
widgets, or extend the functionality of an existing widget. This article explains the different SWT
extension strategies and shows you how to use them.
By Steve Northover & Carolyn MacLeod,
OTI
March 22,
2001
Creating Your Own Widgets
Overview
When writing applications, you typically use the standard widgets provided by SWT. On occasion, you will need to create your own custom widgets. There are several reasons that you might want to do this:
· To add a new type of widget not provided by the standard widgets
· To extend the functionality of an existing widget
Custom widgets are created by subclassing in the existing widget class hierarchy.
Portability Issues
It is very important to think about portability before writing a custom widget. SWT can be extended in the following ways:
· Write a new widget that is 100% Java™ portable
· Extend an existing widget in a 100% Java portable manner
· Write a new widget that wraps an existing native widget – not portable
· Extend an existing widget by calling natives – not portable
In addition, a combination of these can be used on different platforms:
· Write a new widget that wraps an existing native widget on one platform, but is 100% Java portable on other platforms
· Extend an existing widget by calling natives on one platform, but call 100% Java portable code on other platforms
This of course involves implementing the widget twice – using native calls on the one platform and portable code on the others – while maintaining the same API for both.
Each SWT platform is shipped with both a shared library (for example, a DLL on Windows®) and a jar (for the Java class files). The shared library contains all of the native function required for SWT, but it was not meant to be a complete set of the functions available on the platform. Thus to expose native function or native widgets that were not exposed by SWT, you need to write your own shared library. If you are using a combination of native code on one platform and portable code on another, make sure you call your shared library on the platform with the native widget, and your jar on the platform with the portable widget.
One final note: SWT’s interface
to its shared libraries is internal SWT code. It was not meant to provide a framework
for applications to access all possible native function on all platforms – that
would be a daunting task. One of the purposes of this document is to show how
you can integrate C code with SWT, not model the operating system. As such, the
approach taken to writing natives in this document is different from the
approach taken by SWT.
Writing Portable Widgets
The SWT library provides two widget classes that are typically used as the basis for a custom 100% Java portable widget:
· Canvas - to create basic widgets
· Composite - to create compound widgets
Basic Widgets
Basic widgets do not contain any other widgets, and are not built from any other widgets. Basic widgets draw themselves. An example of a basic widget is Button. Another example is Text. To create a custom basic widget, subclass Canvas.
Compound Widgets
Compound widgets contain other widgets, and/or are composed of other widgets. An example of a compound widget is Combo. It contains a Text, a Button and a List. Another example is Group. It can contain any number of children. To create a custom compound widget, subclass Composite.
The astute reader may have noticed that Canvas is actually a subclass of Composite. This is an artifact of the underlying implementation. We treat Canvas as something you draw on and Composite as something that has children. Therefore the rule for deciding which class to subclass is this: If your widget has or will have children, subclass Composite. If your widget does not have and never will have children, subclass Canvas.
Note also that we do not distinguish between a compound widget that is intended to contain and lay out children, and one that is merely composed of other widgets. Both will be a subclass of Composite, and as such we are describing implementation, rather than type, inheritance. When writing 100% Java portable widgets, we can think of Composite as the portable entry point into the SWT class hierarchy for all compound widgets, and Canvas as the portable entry point into the SWT class hierarchy for all basic widgets, regardless of widget type.
Basic Widget
Example
Imagine we are building an application where we need a widget that displays an image with a line of text to the right, something like this:
![]()
Since we plan to draw both the image and the text, we subclass Canvas.
import org.eclipse.swt.*;
import
org.eclipse.swt.graphics.*;
import org.eclipse.swt.widgets.*;
import org.eclipse.swt.events.*;
public class PictureLabel extends Canvas {
Image image;
String text;
}
Our widget needs to be created. To do this, we must write at least one constructor. Because widgets in SWT cannot be created without a parent, the constructor must take at least one argument that is the parent. The convention in SWT is to have a constructor with two arguments, parent and style. Style bits are used to control the look of widgets. Neither the parent nor the style bits can be changed after the widget is created. Your widget can use style bits too.
PictureLabel(Composite parent, int
style) {
super(parent, style);
}
The parent of any widget must be a Composite. The style is an integer, where some bits are already used by the system. For example, SWT.BORDER will cause a Canvas to have a border.
Next we need to initialize our widget. The convention in SWT is to do all initialization in the constructor. Certainly, any initialization that requires the parent or the style bits must be done here. We have decided that our PictureLabel widget will default to a white background, so we need to add a Color field, allocate a Color, and initialize the background.
public class PictureLabel extends Canvas {
Image image;
String text;
Color white;
PictureLabel(Composite parent, int
style) {
super(parent, style);
white = new
Color(null, 255, 255, 255);
setBackground(white);
Colors are graphics resources that must be disposed. How can we dispose of the white color that we allocated? We add a dispose listener. Every widget provides notification when it is destroyed. We add the dispose listener in the constructor.
addDisposeListener(new
DisposeListener() {
public void
widgetDisposed(DisposeEvent e) {
white.dispose();
}
});
}
}
Note: Do not just override dispose() to release the color. This only works in the case where dispose is actually sent to the widget. When the shell is disposed this does not happen, so overriding dispose will leak the color. To ensure that your widget is informed of an event no matter how it was generated, add an event listener instead of overriding methods that generate events.
Our widget is created and initialized, and it can be destroyed without leaking graphics resources. Now it needs some functionality. We need to draw the image and the text, and this will require another listener: the paint listener. Implementing a widget often requires adding many listeners. We could implement the listener interfaces as part of our new widget class, but that would make the interface methods public in our class. Instead, the SWT convention is to use anonymous inner classes to forward the functionality to non-public methods of the same name. For consistency, we will rewrite the dispose listener to follow this convention, moving the color dispose code into the widgetDisposed method. We write the paint listener the same way.
addDisposeListener(new
DisposeListener() {
public void
widgetDisposed(DisposeEvent e) {
PictureLabel.this.widgetDisposed(e);
}
});
addPaintListener(new
PaintListener() {
public void paintControl(PaintEvent e)
{
PictureLabel.this.paintControl(e);
}
});
By choosing the same names, we have the option of easily implementing the interfaces if we decide to do so later. Here is the paintControl method to draw the widget.
void paintControl(PaintEvent e)
{
GC gc = e.gc;
int x = 1;
if (image != null) {
gc.drawImage(image, x, 1);
x = image.getBounds().width + 5;
}
if (text != null) {
gc.drawString(text, x, 1);
}
}
Now we can draw the image and the text, but we need to let the user set them. So we write set and get methods for each of them.
public Image getImage() {
return image;
}
public void setImage(Image image) {
this.image = image;
redraw();
}
public String getText() {
return text;
}
public void setText(String text) {
this.text = text;
redraw();
}
The get methods are trivial. They simply answer the fields. The set methods set the fields and then redraw the widget to show the change. The easiest way to do this is to damage the widget by calling redraw(), which queues a paint event for the widget. This approach has the advantage that setting both the image and the text will cause only one paint event because multiple paints are collapsed in the event queue.
We are not done yet. Our widget does not know its preferred size. This information is needed in order to lay out the widget. In our case, the best size is simply the size of the text plus the size of the image, plus a little bit of space in between. Also, we will add a 1 pixel margin all the way around.
To return the preferred size of the widget, we must implement the computeSize method. The computeSize method can be quite complicated. Its job is to calculate the preferred size of the widget based on the current contents. The simplest implementation ignores the arguments and just computes the size.
public Point computeSize(int wHint, int hHint, boolean changed) {
int width = 0, height = 0;
if (image != null) {
Rectangle bounds = image.getBounds();
width = bounds.width + 5;
height = bounds.height;
}
if (text != null) {
GC gc = new
GC(this);
Point extent = gc.stringExtent(text);
gc.dispose();
width += extent.x;
height = Math.max(height, extent.y);
}
return new Point(width + 2, height +
2);
}
What are wHint, hHint, and changed? The hint arguments allow you to ask a widget questions such as “Given a particular width, how high does the widget need to be to show all of the contents”? For example, a word-wrapping Label widget might be asked this. To indicate that the client does not care about a particular hint, the special value SWT.DEFAULT is used. The following example asks a label for its preferred size given a width of 100 pixels:
Point extent = label.computeSize(100, SWT.DEFAULT, false);
For our PictureLabel widget, we could be fancy and stack the image over the text when the width is too small, and/or wrap the text in order to meet a width request, but for simplicity we have decided not to do so. Still, we need to honour the hints. So, our widget will clip. The easiest way to do this is to perform the calculation and then filter the results.
public Point computeSize(int wHint, int hHint, boolean changed) {
int width = 0, height = 0;
if (image != null) {
Rectangle bounds = image.getBounds();
width = bounds.width + 5;
height = bounds.height;
}
if (text != null) {
GC gc = new
GC(this);
Point extent = gc.stringExtent(text);
gc.dispose();
width += extent.x;
height = Math.max(height, extent.y);
}
if (wHint != SWT.DEFAULT) width = wHint;
if (hHint != SWT.DEFAULT) height = hHint;
return new Point(width + 2, height +
2);
}
Notice that we do not return the hint sizes exactly as specified. We have added the 1-pixel border. Why do we do this? All widgets have a client area and trim. The hint parameters specify the desired size of the client area. We must set the size of the widget so that the size of the client area is the same as the hint, so the size we return from computeSize must include the trim.
What about the changed flag? This is used in conjunction with SWT layout managers and is ignored for basic widgets. This will be discussed when we talk about compound widgets.
Compound Widget Example
Now we will recode the PictureLabel widget as a compound widget. Note that this section assumes that you have read the basic widget example section. This time the widget will be implemented using two Label children: one to display the image, and one to display the text. Since we are using other widgets to implement our widget, we subclass Composite.
public class PictureLabel extends Composite {
Label image, text;
Color white;
PictureLabel(Composite parent, int
style) {
super(parent, style);
white = new
Color(null, 255, 255, 255);
image = new
Label(this, 0);
text = new
Label(this, 0);
setBackground(white);
image.setBackground(white);
text.setBackground(white);
addDisposeListener(new
DisposeListener() {
public void
widgetDisposed(DisposeEvent e) {
PictureLabel.this.widgetDisposed(e);
}
});
As well as initializing the graphics resources in the constructor, we need to create the child widgets and set their background color. A common mistake is to create the child widgets as children of the parent. This would make them peers of our widget. Instead, make sure to create them as children of this. The dispose listener frees the color, as before.
Now that we have handled creation and destruction, we need to lay out the children. There are two possibilities:
· position the children when the widget is resized
· use a layout manager
We will implement both here for comparison.
Positioning Children on Resize
First, we will position the children when the widget is resized. We need to add a resize listener.
addControlListener(new
ControlAdapter() {
public void
controlResized(ControlEvent e) {
PictureLabel.this.controlResized(e);
}
});
}
void
controlResized(ControlEvent e) {
Point iExtent = image.computeSize(SWT.DEFAULT, SWT.DEFAULT, false);
Point tExtent = text.computeSize(SWT.DEFAULT, SWT.DEFAULT, false);
image.setBounds(1, 1, iExtent.x, iExtent.y);
text.setBounds(iExtent.x + 5, 1, tExtent.x, tExtent.y);
}
When the widget is resized, we compute the size of each of our children, and then use their extents and our 5-pixel spacing and 1-pixel margin to position the children using setBounds.
Now we will write the set and get methods. Because we are not drawing the image and text, damaging the widget will not cause the correct behavior. The children must be resized to show their new contents. To do this, we will take the code from the resize listener and move it into a helper method called resize.
void
controlResized(ControlEvent e) {
resize();
}
void resize() {
Point iExtent = image.computeSize(SWT.DEFAULT, SWT.DEFAULT, false);
Point tExtent = text.computeSize(SWT.DEFAULT, SWT.DEFAULT, false);
image.setBounds(1, 1, iExtent.x, iExtent.y);
text.setBounds(iExtent.x + 5, 1, tExtent.x, tExtent.y);
}
Here are the set and get methods.
public Image getImage() {
return image.getImage();
}
public void setImage(Image image) {
this.image.setImage(image);
resize();
}
public String getText() {
return text.getText();
}
public void setText(String text) {
this.text.setText(text);
resize();
}
Now we have to implement the computeSize method. This is a simple matter of asking the children for their preferred sizes.
public Point computeSize(int wHint, int hHint, boolean changed) {
Point iExtent = image.computeSize(SWT.DEFAULT, SWT.DEFAULT, false);
Point tExtent = text.computeSize(SWT.DEFAULT, SWT.DEFAULT, false);
int width = iExtent.x + 5 +
tExtent.x;
int height =
Math.max(iExtent.y, tExtent.y);
if (wHint != SWT.DEFAULT) width = wHint;
if (hHint != SWT.DEFAULT) height = hHint;
return new Point(width + 2, height +
2);
}
Positioning Children With a Layout Manager
Now we will rewrite our compound widget example using a layout manager to position our widget’s children. We could just use an existing SWT layout manager - RowLayout - to position the children, but we promised to explain the changed parameter in the computeSize method. This also gives an example of how this might be done for more complicated layout requirements. In the code that follows, the class PictureLabelLayout extends Layout, and the rewritten PictureLabel class is listed in its entirety.
The layout manager is set into the widget with the following line of code in the widget constructor:
setLayout(new
PictureLabelLayout());
We will call the layout manager in the widget’s two set methods, with the following line of code:
layout(true);
The parameter to the layout method is the changed flag. If true, it indicates that the widget contents have changed (as is the case in the two set methods), therefore any caches that the layout manager may have been keeping need to be flushed. When the widget is resized, the SWT system sends layout(false) to the layout manager, so caches do not need to be flushed. This lets the layout manager perform any expensive calculations only when necessary.
In class PictureLabelLayout, we know that composite.getChildren() will always return exactly two children. In general, a layout manager will have to handle any number of children, so if you are implementing a widget that can have an arbitrary number of children you will need to loop through them to do your calculations. Note that it is in this class that we check the value of the changed flag and optionally flush our two “extent” caches.
Notice that the PictureLabel class has been simplified by using a layout manager. The code in computeSize and resize has been moved to the PictureLabelLayout class, and the resize listener is no longer needed.
import org.eclipse.swt.*;
import
org.eclipse.swt.graphics.*;
import org.eclipse.swt.widgets.*;
import org.eclipse.swt.events.*;
class PictureLabelLayout extends Layout {
Point iExtent, tExtent; // the cached sizes
protected Point
computeSize(Composite composite, int
wHint, int hHint,
boolean changed) {
Control [] children = composite.getChildren();
if (changed || iExtent == null || tExtent == null) {
iExtent = children[0].computeSize(SWT.DEFAULT, SWT.DEFAULT, false);
tExtent = children[1].computeSize(SWT.DEFAULT, SWT.DEFAULT, false);
}
int width = iExtent.x + 5 +
tExtent.x;
int height = Math.max(iExtent.y,
tExtent.y);
return new Point(width + 2, height +
2);
}
protected void layout(Composite
composite, boolean changed) {
Control [] children = composite.getChildren();
if (changed || iExtent == null || tExtent == null) {
iExtent = children[0].computeSize(SWT.DEFAULT, SWT.DEFAULT, false);
tExtent = children[1].computeSize(SWT.DEFAULT, SWT.DEFAULT, false);
}
children[0].setBounds(1, 1, iExtent.x, iExtent.y);
children[1].setBounds(iExtent.x + 5, 1, tExtent.x, tExtent.y);
}
}
public class PictureLabel extends Composite {
Label image, text;
Color white;
PictureLabel(Composite parent, int
style) {
super(parent, style);
white = new
Color(null, 255, 255, 255);
image = new
Label(this, 0);
text = new
Label(this, 0);
setBackground(white);
text.setBackground(white);
image.setBackground(white);
addDisposeListener(new
DisposeListener() {
public void
widgetDisposed(DisposeEvent e) {
PictureLabel.this.widgetDisposed(e);
}
});
setLayout(new PictureLabelLayout());
}
void
widgetDisposed(DisposeEvent e) {
white.dispose();
}
public Image getImage() {
return image.getImage();
}
public void setImage(Image image) {
this.image.setImage(image);
layout(true);
}
public String getText() {
return text.getText();
}
public void setText(String text) {
this.text.setText(text);
layout(true);
}
}
Events and Listeners
Often, you will want a new widget to support an event. For example, you may want your widget to notify listeners when the user selects it. Or you may have an editable widget that should notify listeners when its value has changed.
The details to implement an event called AnEvent are exactly the same as implementing a Java Bean listener:
· create a class called AnEvent which extends java.util.EventObject and may have additional fields related to the event. Usually you want to provide get methods for event fields, but you do not always want to provide set methods. Fields are typically set in the constructor.
· create a class called AnEventListener which implements the java.util.EventListener interface and provides a method called, say, anEventHappened(AnEvent event)
· keep a Vector (or some other collection) of AnEventListener’s in your widget class
· implement addAnEventListener which adds the specified listener to the Vector
· implement removeAnEventListener to remove the specified listener from the Vector
· determine when the event happens in your widget (possibly by adding listeners to your widget) and when it does:
· create an instance of AnEvent called event, initialized as appropriate
· send anEventHappened(event) to each of the AnEventListener’s in the Vector
Say we want PictureLabel widgets to notify listeners when the user clicks the left mouse button in the image. We create class ImageClickedEvent with x and y fields, and interface ImageClickedListener with method imageClicked(ImageClickedEvent event).
public class
ImageClickedEvent extends java.util.EventObject {
public int x, y;
public ImageClickedEvent(Object source, int x, int y) {
super(source);
this.x = x;
this.y = y;
}
}
public interface
ImageClickedListener extends java.util.EventListener {
public void imageClicked(ImageClickedEvent event);
}
We add a Vector to PictureLabel to store the listeners:
Vector imageClickedListeners = new
Vector();
public void
addImageClickedListener(ImageClickedListener listener) {
imageClickedListeners.addElement(listener);
}
public void removeImageClickedListener(ImageClickedListener
listener) {
imageClickedListeners.removeElement(listener);
}
Finally, in PictureLabel’s constructor, we add a mouse listener to the image Label widget, which does the work of notifying the listeners when the left mouse button is clicked over the image.
…
addMouseListener(new
MouseAdapter() {
public void mouseDown(MouseEvent event) {
if (event.button == 1) {
PictureLabel.this.mouseDown(event);
}
}
});
public void mouseDown(MouseEvent event) {
ImageClickedEvent e = new
ImageClickedEvent(this, event.x, event.y);
int size = imageClickedListeners.size();
for (int i = 0; i < size; i++) {
ImageClickedListener listener =
(ImageClickedListener) imageClickedListeners.elementAt(i);
listener.imageClicked(e);
}
}
Sample Application
Now we will use the new widget in an example application. The application simply creates a shell with a PictureLabel child. Then it sets the PictureLabel’s image to a little red square, and text to “Hi there!”. There is no Layout manager for the shell, so we will set the PictureLabel’s size. When the image is clicked, we change the text to “Red!”.
Here is the application code:
import org.eclipse.swt.graphics.*;
import org.eclipse.swt.widgets.*;
public class PictureLabelExample {
public static void main(String [] args) {
Image image = new
Image(null, 20, 20);
Color red = new
Color(null, 255, 0, 0);
GC gc = new
GC(image);
gc.setBackground(red);
gc.fillRectangle(image.getBounds());
gc.dispose();
red.dispose();
Shell shell = new
Shell();
PictureLabel label = new
PictureLabel(shell, 0);
label.setImage(image);
label.setText("Hi there!");
Point size = label.computeSize(SWT.DEFAULT, SWT.DEFAULT, false);
label.setSize(size);
label.addImageClickedListener(new ImageClickedListener() {
public void imageClicked(ImageClickedEvent event) {
((PictureLabel) event.getSource()).setText("Red!");
}
});
shell.open();
Display display = shell.getDisplay();
while (!shell.isDisposed()) {
if
(!display.readAndDispatch()) display.sleep();
}
image.dispose();
}
}
And here is what you see when you run it:
|
|

A PictureLabel in a Shell
Advanced Issues
We have discussed the basics of creating a custom widget: subclassing Canvas or Composite, creating and initializing, setting and getting the widget’s resources, drawing, disposing graphics resources, size and layout, and providing events and listeners. There are some advanced issues that you may need to deal with when you implement a new widget.
SWT Event Mechanism
SWT provides a low-level listener mechanism as well as the usual Java ‘typed’ listeners. Every SWT widget understands addListener(int eventType, Listener listener) and notifyListeners(int eventType, Event event). The eventType constants are defined in class SWT. When an event occurs, the widget creates an SWT Event object containing the appropriate type constant. The notifyListeners method calls handleEvent(Event event) for the Listener. If you need to reuse an existing SWT event, you would typically use this mechanism.
For example, if your widget implements a selection event, you could implement your ‘typed’ add and remove methods as follows:
public void
addSelectionListener(SelectionListener listener) {
addListener(SWT.Selection, new
TypedListener(listener));
}
public void
removeSelectionListener(SelectionListener listener) {
removeListener(SWT.Selection, listener);
}
When the ‘selection event’ occurs in your widget (say, when child1 is selected), you notify the
application’s selection listeners using notifyListeners.
child1.addListener(SWT.Selection, new
Listener() {
public void handleEvent(Event e) {
notifyListeners(SWT.Selection, new
Event());
}
});
Note that when we add the listener we first wrap it in a TypedListener. This is because TypedListener’s handleEvent(Event event) method creates the appropriate TypedEvent subclass based on the type in the Event, and then calls the appropriate method for the typed event. In this way, applications can add Java typed listeners to widgets, but widget implementations can use the more efficient low-level listener mechanism. Make sure that your widget implementation provides a typed listener API, however. Applications should not be calling low-level listener methods. The typed listener methods prevent accidental programming errors such as assuming that all widgets can handle all types of event, or that all fields in the Event class are valid for all events.
Wrapping an SWT Widget
Occasionally, you may find that the best way to implement a new widget is by wrapping an existing SWT widget. For example, to implement a TableTree, you might want to use a Table. To do this, create TableTree as a subclass of Composite, and then in the TableTree constructor create a Table child. The resulting widget will be 100% Java portable because you call the wrapped widget’s API.
Here are some guidelines for wrapping SWT widgets:
· Forward as few methods and events as possible. Do not fall into the trap of automatically reimplementing the complete API of the wrapped widget. This will cause lots of boilerplate code and leave you playing catch up when new API is added to the wrapped widget. If you find that you are automatically forwarding every method, then it might make more sense to implement your code as an ‘adaptor’ (i.e. as a set of listeners that are added to the unwrapped widget when the widget is created).
· Typically the methods you forward will be setFont, setForeground, setBackground, setCursor, setEnabled, setMenu, and setToolTipText. A typical forwarding method calls super to set the value for the parent, and then sets the value for the wrapped widget. You do not usually need to reimplement the corresponding get methods – these return the value from the parent.
· Do not reimplement setData or getData – your widget users can use the data field in the parent.
· Consider exposing the wrapped widget – it does not necessarily need to be hidden.
A complete example of a TableTree widget that was implemented by wrapping a Table is provided in Appendix A: TableTree and TableTreeItem. This example also shows how TableTreeItem was implemented by subclassing Item and wrapping a TableItem. Some of the design decisions that were made are:
· Wrap a Table widget
· Column 0 of the Table widget will contain the ‘tree’ representation
· The image in column 0 will contain a [+] or [-] to show the expanded state of the tree
· Because we are using a Table, we need to use TableColumn and TableItem classes
· Use TableColumn class directly – we do not need to wrap it
· Wrap TableItem to store the expanded state and to enforce the column 0 restrictions
· Implement some of the Tree and TreeItem API methods that make sense for TableTree and TableTreeItem
· Expose the fact that we are wrapping a Table by providing a getTable() method on TableTree. This simplifies our implementation significantly because the user can create columns and show headers and grid lines by going directly to the Table.
· Reimplement common API methods like setFont for convenience
The following page shows an example three-column TableTree, and the application code that created it. The full source listing for TableTree and TableTreeItem is in Appendix A: TableTree and TableTreeItem.

A TableTree in a Shell
public static void
main(String [] args) {
Shell shell = new
Shell();
Image image = new
Image(null, 20, 20);
Color red = new
Color(null, 255, 0, 0);
GC gc = new GC(image);
gc.setBackground(red);
gc.fillRectangle(image.getBounds());
gc.dispose();
red.dispose();
TableTree tableTree = new
TableTree(shell, SWT.BORDER);
tableTree.setSize(320, 200);
Table table = tableTree.getTable();
table.setHeaderVisible(true);
table.setLinesVisible(true);
for (int col = 0; col < 3; col++) {
TableColumn column = new TableColumn(table,
SWT.NONE, col);
column.setText("Column
" + col);
column.setWidth(100);
}
for (int iRoot = 0; iRoot < 8; iRoot++) {
TableTreeItem root = new
TableTreeItem(tableTree, SWT.NONE);
root.setText("Root " +
iRoot);
for (int iBranch = 0; iBranch < 4; iBranch++) {
TableTreeItem branch = new
TableTreeItem(root, SWT.NONE);
branch.setText("Branch
" + iBranch);
for (int col = 1; col < 3; col++) {
branch.setImage(col, image);
branch.setText(col, "R"+iRoot+"B"+iBranch+"C"+col);
}
for (int iLeaf = 0; iLeaf < 4; iLeaf++) {
TableTreeItem leaf = new
TableTreeItem(branch, SWT.NONE);
leaf.setText("Leaf
" + iLeaf);
for (int col = 1; col < 3; col++) {
leaf.setImage(col, image);
leaf.setText(col, "R"+iRoot+"B"+iBranch+"L"+iLeaf+C"+col);
}
}
}
}
shell.pack(); shell.open();
Display display = shell.getDisplay();
while (!shell.isDisposed()) {
if (!display.readAndDispatch())
display.sleep();
}
}
Subclassing Widgets Directly
In extreme circumstances, you may need to subclass a widget other than Canvas or Composite. We recommend against doing this unless all other avenues have been explored and exhausted. Try to wrap the widget first, before subclassing it. Here is why:
· Subclasses may inherit a lot of API that makes no sense, and must be overridden. In Java, you cannot override a method and change the return type; therefore you cannot reimplement some methods.
· Subclassing is typically not the safest way to extend a class that you do not own. For a simplified list of the common arguments, see the article by Bill Venners in the Nov '98 issue of Java World called “Inheritance versus composition: Which one should you choose?” at: http://www.javaworld.com/javaworld/jw-11-1998/jw-11-techniques.html
· Widget subclasses are almost certainly guaranteed to be platform-specific unless great care is taken to ensure that they work on all platforms.
· Subclassed widgets can be affected by changes in the non-API implementation of the superclass.
· Subclassing may cause bad system-level bugs, and runs the risk of leaking resources. For example, if a subclass reimplements a method without making certain that dispose code from the superclass method is still called, then the new method will leak system resources.
· Binary incompatibility across releases becomes possible. If a method signature or field name changes, or new methods or fields are added, there may be a name conflict in the widget subclass. Only Canvas and Composite are guaranteed not to have name conflicts in future releases.
· See any paper by Leonid Mikhajlov on the “Fragile Base Class Problem”. He has a summary of this problem on his web page at: http://www.abo.fi/~lmikhajl/
Consider the example of TableTree. We chose to wrap Table rather than subclass it. The best test is to ask whether a TableTree ‘is-a’ Table. The answer is definitely not – we have simply chosen to implement TableTree using Table. We cannot talk about the ‘rows’ of a TableTree, or index into a TableTree; and the first column of the Table is reserved for the ‘tree’. Many of the operations for a Table do not make sense for a TableTree, for example getSelectionIndex() and getTopIndex().
Subclassing Canvas or Composite is the best way to ensure that your widget works on all SWT platforms. The ‘is-a’ test in this case tests whether your widget is-a basic or compound widget. Subclassing anything else requires asking if the new widget is-an SWT native widget of the type being subclassed. For example, a 100% Java portable PictureLabel is not an SWT native Label.
When subclassing anything other than Composite or Canvas you must override the method protected void checkSubclass() to do nothing. Make sure you read the method comment before overriding it.
Wrapping a Native Widget
Sometimes, an application requires a native widget that is not provided by SWT. This may be a platform widget, or a third party widget, or any other widget in a shared library. In this section, we will describe how to interface to a native widget on the Windows and Motif platforms. This section assumes that you have some understanding of the Java Native Interface, or JNI. Two good books on JNI are:
· “The Java Native Interface, Programmer’s Guide and Specification” by Sheng Liang
· “Essential JNI, Java Native Interface” by Rob Gordon
This section also assumes that you have done some platform programming before, and are proficient in C and in the use of makefiles. You must have platform documentation available, such as the MSDN Library on Windows, and Motif 2.1 documentation or ‘man pages’ for your Motif Unix/Linux system. If you are programming to a third party widget, you will need to know its API.
In this section, we will create a shared library and load it using:
System.loadLibrary("mywidget");
On Windows, this loads a Dynamic Link Library or DLL file called “mywidget.dll”.
On Motif, this loads a Shared Object Library or SO file called “libmywidget.so”.
For our example, we will be building a widget we will call Spinner. On Windows, the native widget we will use is called an UpDown control, and on Motif we will be using an XmSimpleSpinBox. They look like this:
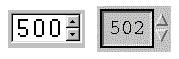
Our Spinner will be numeric, and we want to be able to set and get the maximum and minimum value, as well as the current value (which we will call the ‘selection’, to conform to SWT convention). We also want to be able to set the font. When the user clicks on one of the arrows, we want to notify listeners that the selection has changed, so we will need to implement a selection listener. The test code for our widget looks something like this (the full source listing for class SpinnerTest is in Appendix B: SpinnerTest and Spinner):
final
Spinner spinner = new
Spinner(shell, 0);
spinner.setMaximum(999);
spinner.setSelection(500);
spinner.setMinimum(100);
Font
font = new
Font(display, "Courier", 20,
SWT.NORMAL);
spinner.setFont(font);
spinner.addSelectionListener(new
SelectionAdapter() {
public void
widgetSelected(SelectionEvent e) {
System.out.println(spinner.getSelection());
}
});
The next step is to write the API in Java. Since we know we will be writing the native interface file (we’ll call it “spinner.c”) twice – once on Windows and once on Motif – we try to write the Java code only once so that it is easier to maintain. We start by creating a subclass of Composite, and we load the shared library in a static initializer:
static {
System.loadLibrary("spinner");
}
This will load a file called “spinner.dll” on Windows, and “libspinner.so” on Motif. Since we know that creating a widget returns a ‘handle’ on both platforms, we define an instance variable to hold the handle:
int handleSpinner;
Since we will be providing a listener, we know that we will need to map this handle back to the Java Spinner object when the platform calls in to Java to notify us of the event. So we create a static Hashtable that will contain Spinner handles as keys and Spinner objects as values:
static Hashtable table = new Hashtable();
Now we write the constructor. We add the handle to the table after the widget is created, and we remove it when the widget is destroyed. Note that we don’t create the widget in Java. We will create it later, in the native createControl method. We also forward all controlResized and focusGained events to the native resizeControl and setFocus methods, and set our font to the default font using the native setFont method. There is one more thing to explain in the constructor. You may notice that we are actually creating two widgets: a Composite parent named handle in the call to super, and a Spinner child named handleSpinner in the call to createControl. This wraps the native control in an SWT parent, allowing it to participate in the SWT system.
public Spinner(Composite parent, int style) {
super(parent, style);
int handleParent = handle;
handleSpinner = createControl(handleParent);
if (handleSpinner == 0) SWT.error(SWT.ERROR_NO_HANDLES);
table.put(new Integer(handleSpinner), this);
addDisposeListener(new DisposeListener() {
public void widgetDisposed(DisposeEvent e) {
Spinner.this.widgetDisposed(e);
}
});
addControlListener(new ControlAdapter() {
public void controlResized(ControlEvent e) {
Spinner.this.controlResized(e);
}
});
addFocusListener(new FocusAdapter() {
public void focusGained(FocusEvent e) {
Spinner.this.focusGained(e);
}
});
Font font = getFont();
setFont(handleSpinner, font.handle);
}
public void
widgetDisposed(DisposeEvent e) {
table.remove(new Integer(handleSpinner));
handleSpinner = 0;
}
public void controlResized(ControlEvent e) {
Rectangle rect = getClientArea();
resizeControl(handleSpinner, rect.x,
rect.y, rect.width, rect.height);
}
public void focusGained(FocusEvent e) {
setFocus(handleSpinner);
}
static final native int createControl(int handleParent);
static final native void resizeControl(int handle, int x, int y, int width, int height);
static final native void setFocus(int handle);
We write the setFont API method to call the native setFont method with the Spinner handle and the font handle. Call super.setFont because some superclasses need to set fonts for things like titles – it will not actually be needed in this case, but by convention widgets usually inform their superclass of font and color changes.
public void setFont(Font font) {
super.setFont(font);
int hFont = 0;
if (font != null) hFont = font.handle;
setFont(handleSpinner, hFont);
}
static final native void setFont(int handle, int hFont);
In a similar manner, we write the remaining set and get API methods and declare the corresponding native methods. The checkWidget method simply checks that the widget is still valid.
public void setSelection(int selection) {
checkWidget();
setPosition(handleSpinner, selection);
}
public int getSelection() {
checkWidget();
return getPosition(handleSpinner);
}
public void setMaximum(int maximum) {
checkWidget();
setMaximum(handleSpinner, maximum);
}
public int getMaximum() {
checkWidget();
return getMaximum(handleSpinner);
}
public void setMinimum(int minimum) {
checkWidget();
setMinimum(handleSpinner, minimum);
}
public int getMinimum() {
checkWidget();
return getMinimum(handleSpinner);
}
static final native void setPosition(int handle, int position);
static final native int getPosition(int handle);
static final native void setMaximum(int handle, int max);
static final native int getMaximum(int handle);
static final native void setMinimum(int handle, int min);
static final native int getMinimum(int handle);
As with all widgets we implement, we need to provide a computeSize method to compute the preferred size of the widget. This one also forwards to a native to do the work. In this case, the native needs to return two integers (width and height) so we use an int array of size 2 to hold the returned values:
public Point computeSize(int wHint, int hHint, boolean changed) {
checkWidget();
int [] result = new int [2];
computeSize(handleSpinner, result);
if (wHint != SWT.DEFAULT) result [0] = wHint;
if (hHint != SWT.DEFAULT) result [1] = hHint;
int border = getBorderWidth();
return new Point(result [0] + border * 2, result [1] + border * 2);
}
static final native void computeSize(int handle, int [] result);
Finally, we need to define the listener interface. The addSelectionListener method simply adds an SWT.Selection listener using the SWT low-level listener mechanism. The widgetSelected method is special. It is the entry point into Java when the event occurs. In other words, we will be calling this method from C. When the method is called, it determines the Spinner for the event by looking in the table, and then forwards to the SWT event mechanism by calling notifyListeners.
public void addSelectionListener(SelectionListener listener) {
if (listener == null) throw new SWTError(SWT.ERROR_NULL_ARGUMENT);
addListener(SWT.Selection, new TypedListener(listener));
}
static void widgetSelected(int handle) {
Spinner spinner = (Spinner) table.get(new Integer(handle));
if (spinner == null) return;
spinner.notifyListeners(SWT.Selection, new Event());
}
Notice that the Event object that we create for the Spinner selection listener does not need to have any fields set. If you need to return more information for your event, such as the x and y coordinates of the event or the key that was pressed, then your call-in method (widgetSelected, in this case) will have to have more parameters than just the handle.
One more thing to note before we write the C code. All of our native methods have been defined as static methods, and all of them have the handle passed as the first parameter. This consistency makes it easier to write the C native code.
The full source code listing for the Java Spinner class is in in Appendix B: SpinnerTest and Spinner. Now we need to write the native interface methods in C. First we will write the native interface for Windows, and then we will write it for Motif.
Windows Native Code
Now we really get into JNI and platform programming. We will write a C file called “spinner.c”. It needs to implement the following Java methods from class spinner.Spinner:
static final native int createControl(int handleParent);
static final native void computeSize(int handle, int [] result);
static final native void resizeControl(int handle, int x, int y, int width, int height);
static final native void setPosition(int handle, int position);
static final native int getPosition(int handle);
static final native void setMaximum(int handle, int max);
static final native int getMaximum(int handle);
static final native void setMinimum(int handle, int min);
static final native int getMinimum(int handle);
static final native void setFont(int handle, int hFont);
static final native void setFocus(int handle);
It also needs to call in to the following Java method when the selection changes:
static void widgetSelected(int handle);
The first thing we need to do is to include at least these three files. Your control may require additional files.
#include <jni.h>
#include <windows.h>
#include <commctrl.h>
We will start with the createControl method. Recall that we decided to use a Windows UpDown control. If we create an Edit control first, and then create the UpDown control with UDS_AUTOBUDDY
and
UDS_SETBUDDYINT flags set, then the Edit control will automatically be
associated with the UpDown control’s
arrows. We can retrieve the Edit control
by sending UDM_GETBUDDY to the UpDown control. We will
show you the complete createControl
method after we explain how to call in to Java.
Calling in to Java:
The first time we ever call createControl, we initialize some static variables:
static DWORD tlsIndex = 0;
static jobject javaClass;
static jmethodID mid;
static WNDPROC oldProc;
We use one of them (tlsIndex) as a flag to make sure we initialize them only once. Here is the initialization code from createControl:
if (tlsIndex == 0) {
tlsIndex = TlsAlloc();
if (tlsIndex == -1) return (jint) 0;
javaClass = (*env)->NewGlobalRef(env, (jobject) that);
mid = (*env)->GetStaticMethodID(env, (jobject) that, "widgetSelected", "(I)V");
oldProc = (WNDPROC) GetWindowLong((HWND) hwndParent, GWL_WNDPROC);
}
TlsSetValue(tlsIndex, (LPVOID) env);
These variables are needed to implement call-in. As this is important code, we will describe each variable that is initialized:
tlsIndex = TlsAlloc();
if (tlsIndex == -1) return (jint) 0;
…
}
TlsSetValue(tlsIndex, (LPVOID) env);
Here, we allocate a Windows Thread Local Storage (TLS) index, and then (for each Spinner) we use the TLS index to store a pointer called env. Notice that JNIEnv *env is the first parameter passed to every JNI method. It is a pointer to a function table, and it is only valid in the thread associated with it. We know that we need to call in to Java when the user changes the Spinner value, and that we will be calling in from a Windows ‘window procedure’ or WNDPROC. The WNDPROC does not know about the Java environment. When the WNDPROC is invoked, we will need ‘env’. So we have to save it on creation so that we have it when we need to call in. We also need the class and method ID to call in to, and we can store these in statics because they will be the same across all threads:
javaClass = (*env)->NewGlobalRef(env, (jobject) that);
mid = (*env)->GetStaticMethodID(env, (jobject) that, "widgetSelected", "(I)V");
When the user changes the Spinner value, the UpDown sends a WM_VSCROLL to its parent control. In order to see this message, it is necessary to “subclass the window proc” of the parent. In Windows, this means replacing the window proc of the parent with our own window proc. The new WNDPROC will look for WM_VSCROLL (in order to notify the Java code that the Spinner value has been changed) and then call the previous WNDPROC to handle other messages that our control is not interested in. Note that it is important to call the previous WNDPROC, or the parent window will not behave properly (i.e. it will not paint or resize, etc.) We store the previous WNDPROC in oldProc:
oldProc = (WNDPROC) GetWindowLong((HWND) hwndParent, GWL_WNDPROC);
The last line in createControl before we return the new handle installs a WNDPROC called WindowProc:
SetWindowLong((HWND) hwndParent, GWL_WNDPROC, (long) WindowProc);
Here is the code for our WindowProc. First we retrieve env from Thread Local Storage and check if an exception has occurred. Then we see if this is an “UpDown value changed” event (a WM_VSCROLL message with SB_THUMBPOSITION in the low order bits of wParam). If it is, we use env to call in to the Java static method called “widgetSelected”, passing lParam as the handle of the UpDown control. Otherwise, we just forward to the parent control’s window procedure.
LRESULT CALLBACK WindowProc(HWND hwnd, UINT msg, WPARAM wParam, LPARAM lParam) {
JNIEnv *env = TlsGetValue(tlsIndex);
if (env != NULL) {
/* If an exception has already occurred,
* allow the stack to unwind so that the
* exception will be thrown in Java. */
if ((*env)->ExceptionOccurred(env)) return 0;
switch (msg) {
case WM_VSCROLL:
if ((wParam & 0xFFFF) == SB_THUMBPOSITION) {
return (LRESULT) ((*env)->CallStaticIntMethod(env, javaClass, mid, lParam));
}
break;
}
}
return CallWindowProc(oldProc, hwnd, msg, wParam, lParam);
}
And finally, here is the code for createControl:
JNIEXPORT jint JNICALL Java_spinner_Spinner_createControl
(JNIEnv *env, jclass that, jint hwndParent)
{
HWND hwndText, hwndUpDown;
if (tlsIndex == 0) {
tlsIndex = TlsAlloc();
if (tlsIndex == -1) return (jint) 0;
javaClass = (*env)->NewGlobalRef(env, (jobject) that);
mid = (*env)->GetStaticMethodID(env, (jobject) that, "widgetSelected", "(I)V");
oldProc = (WNDPROC) GetWindowLong((HWND) hwndParent, GWL_WNDPROC);
}
TlsSetValue(tlsIndex, (LPVOID) env);
hwndText = CreateWindowEx(
WS_EX_CLIENTEDGE,
"EDIT",
NULL,
WS_CHILD | WS_VISIBLE | WS_TABSTOP,
0, 0, 0, 0,
(HWND) hwndParent,
0,
GetModuleHandle(NULL),
NULL);
if (hwndText == 0) return (jint) 0;
hwndUpDown = CreateWindowEx(
0,
UPDOWN_CLASS,
NULL,
WS_CHILD | WS_VISIBLE | UDS_AUTOBUDDY | UDS_SETBUDDYINT | UDS_ALIGNRIGHT | UDS_ARROWKEYS | UDS_NOTHOUSANDS,
0, 0, 0, 0,
(HWND) hwndParent,
0,
GetModuleHandle(NULL),
NULL);
if (hwndUpDown == 0) return (jint) 0;
SetWindowLong((HWND) hwndParent, GWL_WNDPROC, (long) WindowProc);
return (jint) hwndUpDown;
}
The set and get methods we need to implement are much simpler than the createControl and WindowProc methods. Here are setPosition and getPosition. They simply send the UDM_SETPOS or UDM_GETPOS message to the UpDown handle. The remaining set and get methods are similar, and they are listed in Appendix C: Spinner for Windows. The only interesting one is setFont, which sets the font of the Edit control, which it gets by sending UDM_GETBUDDY to the UpDown handle.
JNIEXPORT void JNICALL Java_spinner_Spinner_setPosition
(JNIEnv *env, jclass that, jint hwnd, jint position)
{
SendMessage((HWND) hwnd, UDM_SETPOS, 0, position);
}
JNIEXPORT jint JNICALL Java_spinner_Spinner_getPosition
(JNIEnv *env, jclass that, jint hwnd)
{
return (jint) SendMessage((HWND) hwnd, UDM_GETPOS, 0, 0) & 0xFFFF;
}
The resizeControl method positions the Edit control (the buddy) and the UpDown (the arrow buttons) using the specified coordinates and size. For the width of the arrow buttons, we use the width of a typical vertical scrollbar.
JNIEXPORT void JNICALL Java_spinner_Spinner_resizeControl
(JNIEnv *env, jclass that, jint hwndUpDown, jint x, jint y, jint width, jint height)
{
HWND hwndText = (HWND) SendMessage((HWND) hwndUpDown, UDM_GETBUDDY, 0, 0);
UINT flags = SWP_NOZORDER | SWP_DRAWFRAME | SWP_NOACTIVATE;
int upDownWidth = GetSystemMetrics(SM_CXVSCROLL);
SetWindowPos(hwndText, (HWND) 0, x, y, width - upDownWidth + 2, height, flags);
SetWindowPos((HWND) hwndUpDown, (HWND) 0, x + width - upDownWidth, y, upDownWidth, height, flags);
}
The final method we need to write is computeSize. This is typically a complex method, and our computeSize is no exception. We construct a string of digits the same length as the maximum value, and measure its height and width if drawn in the Edit control’s font. We make sure our control is no shorter than a combo box, and we add in text margins, and the width of the arrow buttons. In order to return the computed height and width values in the result array, we need to lock down the array using the JNI function GetIntArrayElements to protect it from moving as a result of garbage collection.
JNIEXPORT void JNICALL Java_spinner_Spinner_computeSize
(JNIEnv *env, jclass that, jint hwndUpDown, jintArray result) {
int width, height;
TEXTMETRIC tm;
RECT rect;
int comboHeight;
int max, digits;
UINT flags;
char text[64];
HWND hwndText = (HWND) SendMessage((HWND) hwndUpDown, UDM_GETBUDDY, 0, 0);
HDC hDC = GetDC(hwndText);
HFONT oldFont = 0;
HFONT newFont = (HFONT) SendMessage(hwndText, WM_GETFONT, 0, 0);
jint *result1 = NULL;
result1 = (*env)->GetIntArrayElements(env, result, NULL);
if (newFont != 0) oldFont = SelectObject(hDC, newFont);
GetTextMetrics(hDC, &tm);
comboHeight = GetSystemMetrics(SM_CYVSCROLL);
height = (comboHeight > tm.tmHeight) ? comboHeight : tm.tmHeight;
max = SendMessage((HWND) hwndUpDown, UDM_GETRANGE, 0, 0) & 0xFFFF;
if (max > 0) {
digits = 0;
while (max > 0) {
text[digits] = '0';
max /= 10;
digits++;
}
flags = DT_CALCRECT | DT_EDITCONTROL | DT_NOPREFIX;
DrawText(hDC, (LPCTSTR) text, digits, (LPRECT) &rect, flags);
width = rect.right - rect.left + 3;
} else {
width = 10;
}
if (newFont != 0) SelectObject(hDC, oldFont);
ReleaseDC(hwndText, hDC);
width += GetSystemMetrics(SM_CXVSCROLL);
SendMessage(hwndText, EM_GETRECT, 0, (LPARAM) &rect);
if (rect.top == 0) rect.top = 1; // windows bug fix
width += (rect.left + 1) * 2;
height += (rect.top + 1) * 2;
result1 [0] = width;
result1 [1] = height;
(*env)->ReleaseIntArrayElements(env, result, result1, 0);
}
The full source listing for the Windows C code and makefile are in Appendix C: Spinner for Windows. A batch file sets environment variables and calls make to create the DLL. Options for your compiler and linker may differ, but you will have to link in the win32 libs: comctl32.lib, user32.lib, and gdi32.lib.
Motif Native Code
Now we need to write “spinner.c” for Motif. In this section, we will only point out the differences between the Motif “spinner.c” and the Windows one. The full source listing for the Motif C code and makefile are in Appendix D: Spinner for Motif. A shell script sets environment variables and calls make.
The Motif equivalent to Thread Local Storage is called Thread-Specific Data (TSD), and its functions are defined in pthread.h. You will need to include at least the following files:
#include <jni.h>
#include <Xm/XmAll.h>
#include <pthread.h>
In order to store the env pointer in Thread-Specific Data, you first create a key:
static pthread_key_t envKey;
…
pthread_key_create(&envKey, NULL);
and then you store into and retrieve from TSD as follows:
pthread_setspecific(envKey, env);
JNIEnv *env = (JNIEnv *) pthread_getspecific(envKey);
As you compare the Windows and Motif “spinner.c” listings, you will notice that the JNI portions of the code are identical: method templates, the use of JNI functions like GetIntArrayElements and ReleaseIntArrayElements for locking/releasing an array of integers, and NewGlobalRef, GetStaticMethodID, and CallStaticIntMethod to call in to Java.
The platform code, however, is completely different. On Motif, we create the native control using XmCreateSimpleSpinBox. The Text widget is created automatically and stored in the XmNtextField resource of the SimpleSpinBox. You can retrieve the Text (for setting the font or computing the preferred size) using:
Arg arg;
Widget handleText;
XtSetArg(arg, XmNtextField, &handleText);
XtGetValues((Widget) handle, &arg, 1);
After creating the SimpleSpinBox, we have to ‘manage’ it, and then we add an XtCallbackProc for the valueChanged callback:
XtManageChild(handleSpinBox);
XtAddCallback(handleSpinBox, XmNvalueChangedCallback, (XtCallbackProc) Callback, NULL);
The computeSize
method is about as complex as the one for Windows, with height and width based
on the maximum number of digits, with margins and shadows added in.
Unfortunately, we had to guess a nice width for the arrow buttons, as this value
could not be retrieved from a SimpleSpinBox.
Mixing Native and Java Widgets
Occasionally it is necessary to implement a widget using a native widget on one platform, and emulating the widget behavior with Java code on another platform. SWT does this for several widgets; for example, Tree is native on Windows, and emulated on Motif. All of the code to implement Tree on Motif is shipped in the SWT jar for Motif. On Windows, the API for Tree is shipped in the Windows SWT jar and the interface to the native control is shipped in the Windows SWT shared library (SWT.DLL).
When emulating a widget on one platform and wrapping a native or third party widget on another, it is important to subclass at the same point in the Widget hierarchy on both platforms (i.e. Composite or Canvas). It is also important to make certain that the public API is identical for both widgets. This makes it possible for applications to run on any platform without recompiling.
Looking at the Spinner example in the previous section, suppose we now want to have a Spinner on a third platform that does not have a native SpinBox or UpDown control. Since we subclassed Composite on Windows and Motif, we again subclass Composite on the new platform. Then we create three children: a Text and two arrow Buttons. Then we fill in the API and write our widget as described earlier in the Compound Widget Example section. The full source code listing for this 100% Java Spinner is in Appendix E: Spinner for Any Platform.
Summary
SWT provides several different ways to implement new widgets. The simplest method, and the one you will typically use, is to subclass Canvas or Composite and add listeners and methods to get the job done.
In certain cases the specification for your new widget will so closely resemble a single existing SWT widget that you will want to use that widget in your implementation. The recommended way to do this is to wrap the SWT widget in a subclass of Composite, and implement a carefully determined subset of the wrapped widget’s methods by forwarding to the wrapped widget.
Occasionally, you may need to wrap a platform or third party widget by writing a platform-specific shared library that makes calls to this widget. You can then subclass Composite and provide a Java native interface to your library code.
Finally, in very special and rare circumstances, you can subclass an existing SWT widget, but this is not recommended.
Example Code
Appendix A: TableTree and TableTreeItem
Appendix B: SpinnerTest and Spinner